Showing posts with label Holiday Projects. Show all posts

Thursday, December 12, 2013

Festive Flurry Snowflakes

I decided to make these really cute snowflakes for my daughter to take to the Wellness Center for Christmas.  I was brave and ordered 3 packs (30) to make from SU.  If you are interested in making these there is a lot of how-to videos on Youtube.  I have to say they weren't too hard to make, but they did take more time than I thought they would.  Hot gluing the two different snowflakes took a lot of time, patience and a lot of glue.  Once I realized that I couldn't rush the process things went along smoothly.  The glue needed a least a minute to set up for each one.  I set up everything assembly line and before long it was done!  I have to say that I'm really happy with the results and can hardly wait to see the looks on the patients faces. 


Here's a close up of the finished product.


On the back I decided to stamp a greeting with the Endless Wishes stamp set I had just purchased and used my white craft ink with the little snowflake to finish it off.  I really liked putting 2 different stamps sentiments together on a block to stamp.


I wrapped them all in plastic bags and tied them up with a little poem I had used the other year about snowflakes.


Here's the poem:

Snowflake Legend
 
Long, long ago, a shining star
Led the way to a CHILD born in a
Manager.  It is believed that SNOWFLAKES
Are little pieces of that gleaming star that
Guides us to the light of the world,
Our Lord, Jesus Christ.


I put everything in a basket with some ribbon and decided to add some candy canes to go along with the snowflakes!

I'm sure everyone is rushing around like crazy trying to get everything done in time.  I spent most of the day shopping today getting last minute items.  We are suppose to get a snowstorm this weekend and wanted to try and finish up before it starts.  I always have the family at my house the Sunday before Christmas and before I know it will be here.  Have a wonderful weekend.

Thanks for stopping bye,
Nancy, Rachel & Sarah

Monday, November 25, 2013

Thanksgiving Pumpkin Centerpiece

I started this pumpkin project a few weeks ago and then it was put on hold while my daughter was in the hospital giving birth.  I wanted it for my centerpiece for Thanksgiving, so I thought I had better finish it.  I saw this on Pinterest and went to the website - The Kraft Journal - for the directions.


I really liked how this turned out.  I put it on one of my pumpkin platters with some dried pine cones and berries for a base.  To make my leaves I used the Autumn Accents Die which also has a cute little acorn.  My crafting friend from Florida - Martha - sent Denise and I a bunch of great buttons.  The one I glued to the stem fit the bill - hanging dried corn!  Great timing!

Joe and I spent some time with Jennifer last week and loved every minute.  Both her and my daughter are doing well.  We have a lot to be thankful for this holiday!  I have Thanksgiving at my house, so lots to get down before Thursday.  Rachel and Sarah have half days and are off Wed.  They are going to help me get ready as my list is way too long!  Hopefully, the weather will cooperate.

All of us in the Pansy Patch would like to wish you and your families a wonderful Thanksgiving Holiday!


        Nancy              Rachel              Sarah

Tuesday, July 2, 2013

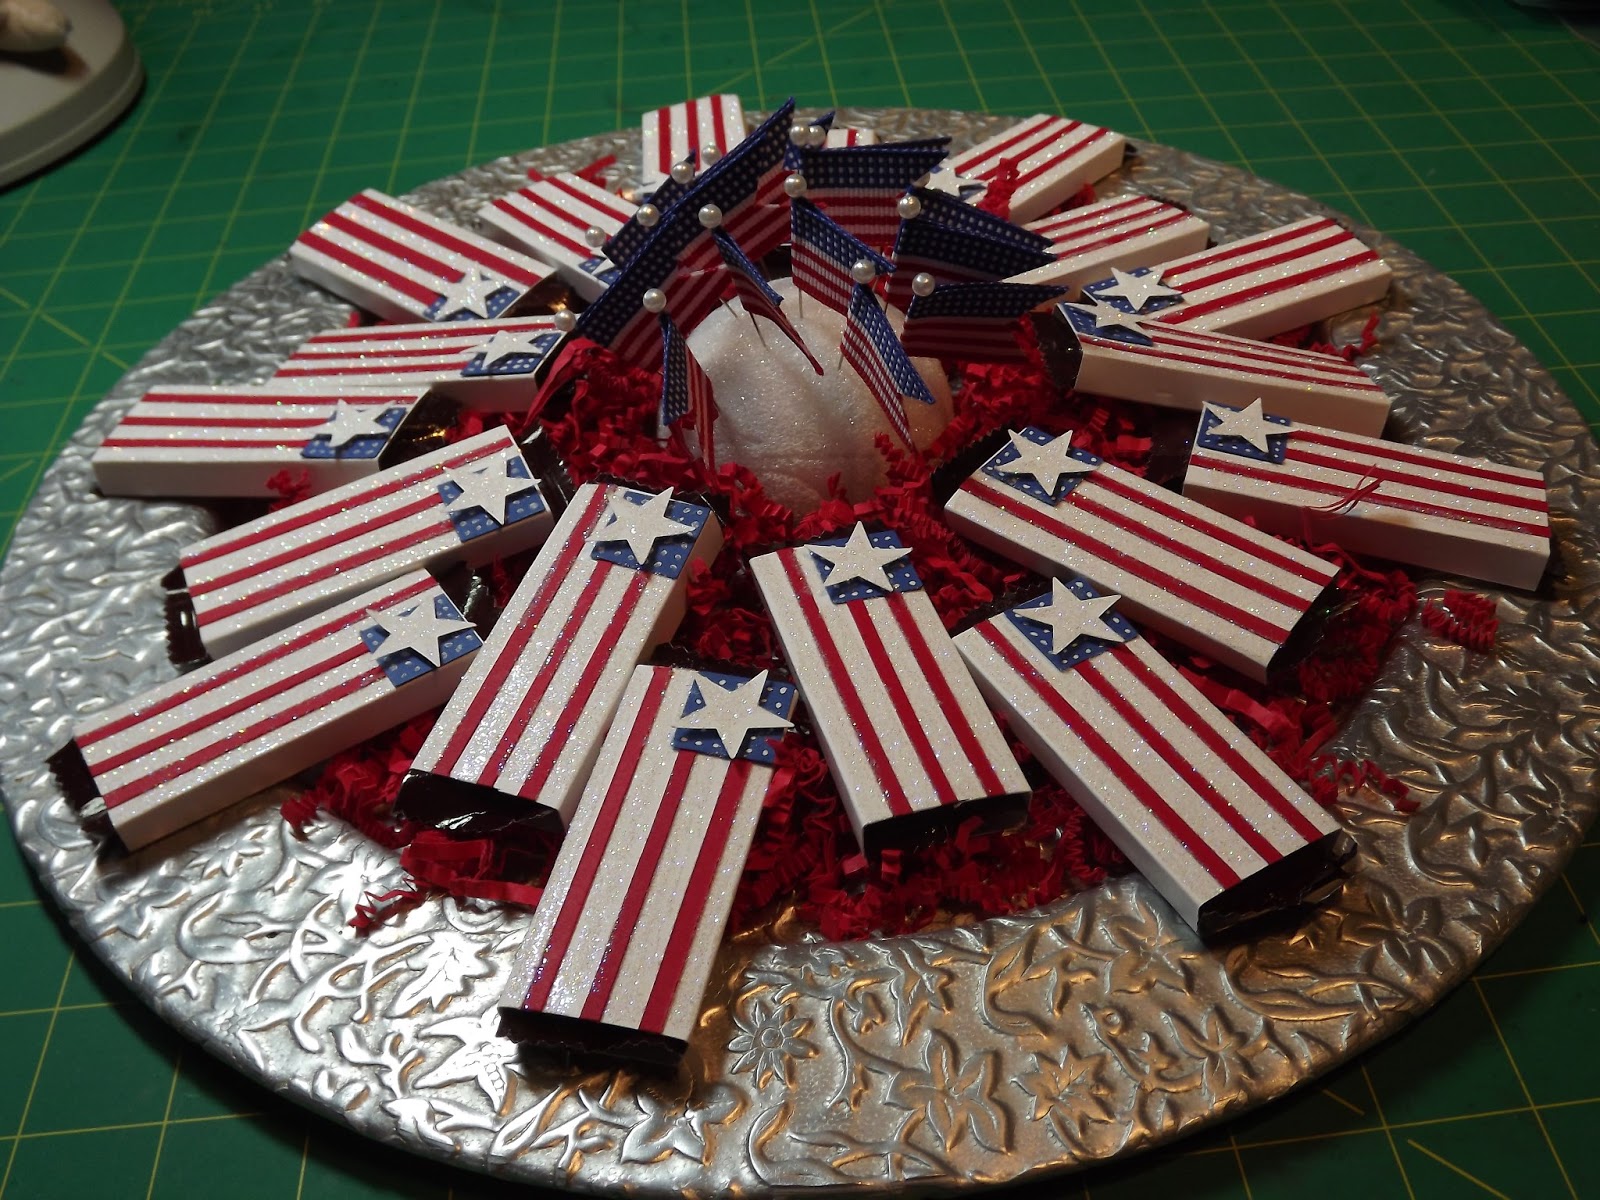
4th of July Candy Wrapper

Every 4th of July I make these cute candy wrappers for my daughter to take to the hospital.  I saw this done years ago on Dawn's Stamping Thoughts and loved it and make them every year.  This year I decided to make some of the Flag Picks to go along with them.


The hardest thing about making these are cutting the red stripes thin enough.  I had a bunch of them piled up and it brought back memories of playing - Pick Up Sticks!!  I'm probably dating myself, but as a kid we loved playing this game!  We're looking forward to a great 4th of July and lots of fireworks!  My friend Denise invites us over to her house every year to see the fireworks - she has a great view, so the girls are looking forward to that again this year! 

Thanks for stopping bye,
Nancy, Rachel & Sarah

Saturday, March 30, 2013

Chenille Bunny Eggs

Thanks to Rachel and Sarah I am ready (I think) for Easter.  We spent most of the day yesterday cleaning, cooking and crafting.  The girls wanted to made a video, so we saved one of these eggs to make on video but didn't realize how out of view we were. So we will have to try another time.  I saw these cute Bunny Eggs HERE and knew I wanted to make them for this year's table favors.  We filled them with jelly beans!


Unfortunately, the only chenille stems I had were green but that didn't stop us!  Thank you Denise for sending up the little pom poms for the tails!  I think they worked out great.  In the picture, I turned the end bunnies around so you could see the tails! The only thing we did different was Sarah wanted to put eyes on - bunnies have to see where to hide the eggs!

With left over chenille Sarah decided to make a stick man.


Well, hopefully the weather will hold out until after we have our egg hunt tomorrow.  Everyone at the Pansy Patch would like to wish you and your families a "Happy Easter".

Nancy     Rachel    Sarah


Thursday, March 28, 2013

Easter Bunny Treat Bags

Every year I make these cute bunny treat bags.  They come together so quick and easy and the kids love them - as well as the adults!


I usually match up the paper with the different color peeps that I find.  This year was Pretty in Pink, Wisteria Wonder and Daffodil Delight.  I used my Top Note Bigz Die and then scored it in half.  The eyes were made using the 1" and 3/4" circle punches and the ears were made with the oval punches.  I glued the ears on the back of the top note and my sentiment on the front of my 4" x 6" clear bag.  I used the Happy Easter from SU's Teeny Tiny Wishes.  I put some green grass on the inside along with two little peeps and stapled the top note over the bag to close it.  I covered up the staples in the front with my bunny's eyes.  I then used my gel pen to make some eyes and whiskers.  They disappeared pretty fast  - these are all I have left for Easter day.

Spent most of the day shopping and cooking.  Rachel and Sarah are coming up tomorrow to help out and make some table favors.  I hard boiled 3 dozen eggs to color as well, so we will have plenty to keep us busy!  Have a great weekend!

Thanks for stopping bye,
Nancy, Rachel & Sarah


Tuesday, March 26, 2013

Blossom Flower Treat Bags

This week is moving along much too fast!  Sarah was up over the weekend and wanted to make some treat bags for her teachers for Easter.  I had some leftover Blossom Flowers so this is what we came up with.


We just put them in  4"x6" clear bags.  I always seal my bags with the tiny plastic hair ties that you can purchased in CVS.  This way I don't have to stuggle putting the tag on.  She used my Framelit from SU for the tag and my Teeny Tiny wishes Happy Easter stamp from SU for the sentiment.  We tied it around the top of the bag with 1/8" ribbon and we were done. 

I also had some pillow boxes left over over as well.


These come together so quickly.  I don't have the die from SU but you can buy various sizes at Michael's in different colors.  I used a background stamp to give the pouch some definition and tied some ribbon around one end.  I used my "Happy Easter" stamp from Michael's and cut it out with a Spellbinders die.  You can put anything you want inside.  We used the rest of our Blossom Flowers.

Hope you are having a good week.  One more day and the girls are off from school!!!  Yea!! Rachel has to go back though on Monday to make up a snow day - she's not too happy about that!

Thanks for stopping bye,
Nancy, Rachel & Sarah


Sunday, March 24, 2013

Easter Goodie Tray

This weekend I finished up a tray for my daughter to take to the Wellness Center this week.  I've made these little flowers the past few years and they are always a big hit!


Supplies:

Stamps - Mixed Bunch - SU
Ink - Summer Sun, Melon Mambo, Wisteria Wonder - SU
Paper - Whisper White, Garden Green - SU
Punches - Modern Label, Blossom - SU
Candy - Rolo's - Easter Package

These cute flowers are so easy to make and come together quickly.  Stamp the flower on the Whisper White CS with the ink of choice and then punch it out with the coordinating punch.  Then I use the Modern Label punch for the leaves in Garden Green.  I  cut them in half and using mini glue dots I adhere the two pieces on the back of the flower to form the leaves.  I then adhere the Rollo candy with a glue dot in the center of the flower and you're done! I found a cute watering can and put the rabbit inside for the fun of it!

It's hard to believe that Easter is next weekend, and we are expecting more snow again tonight into tomorrow!  The girls are hoping for no school!  I always have Easter dinner and the Easter Egg Hunt so it will be a busy week!

Thanks for stopping bye,
Nancy, Rachel & Sarah


Monday, March 11, 2013

St. Patrick's Day Basket of Goodies

I had some goodies left over from my last tray I had made up, so I decided to put together a quick basket for my daughter to take to the hospital for her co-workers to enjoy.


All I did was line the basket with some green doilies and tie a green bow on the handle.  I stamped some whisper white paper with the Happy St. Patrick's stamp from SU and punched it out with the large scalloped from SU.

I then made up some quick goodie bags for the girls to hand out to their teachers.


Supplies:

Paper - Whisper White, Garden Green - SU
Stamps - Happy St. Patrick's - SU
Accessories - Top Note Die - SU, plastic bags

I scored the Top Note die in half - lengthwise - and then stamped my sentiment on it.  I used up the rest of my goodies from my other projects this week putting them in a  4x6" plastic bag.  I stapled the Top Note on either side and covered up the staple with some left-over shamrocks and they were done!

It's hard to believe that I'm starting to decorate for Easter.  These holidays are just going bye way too fast!  Hope you have a great week!

Thanks for stoppping bye,
Nancy, Rachel & Sarah


Friday, March 8, 2013

St. Patrick's Day Goodies

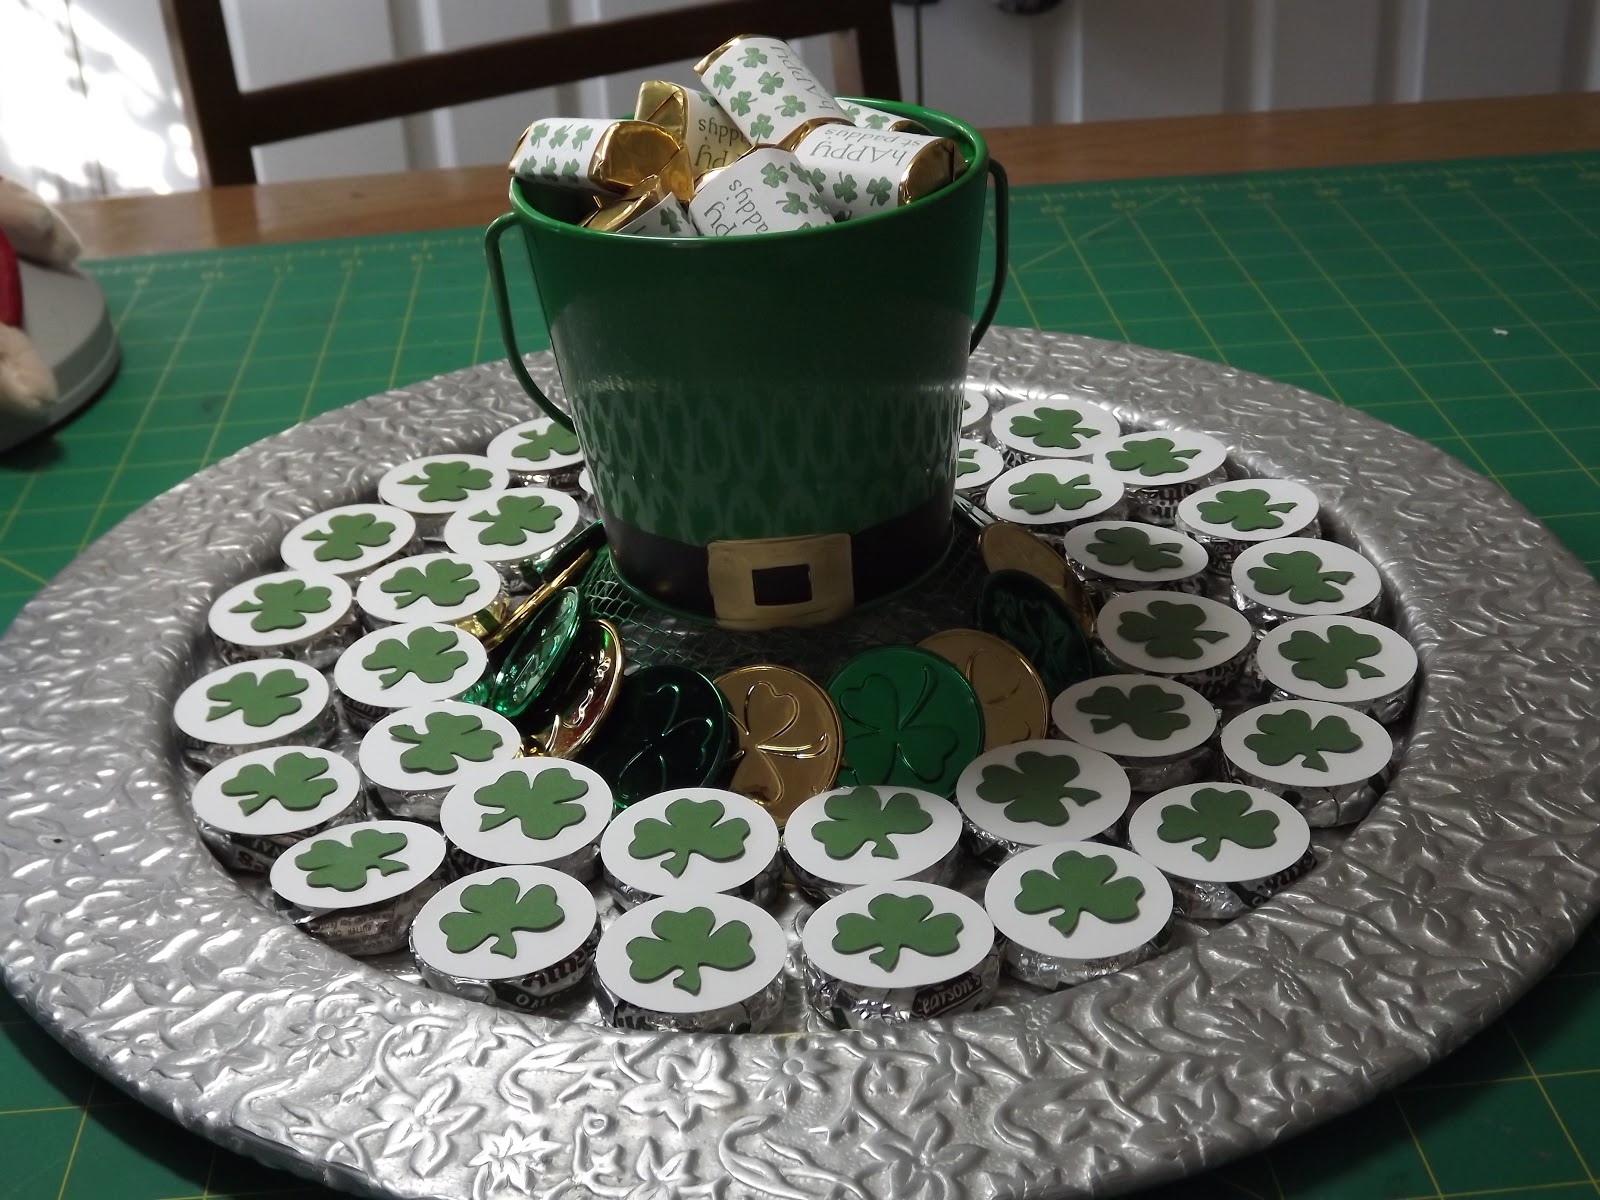
Here is another tray of goodies that I just finished for my daughter to take to the group at the Wellness Center to help celebrate St. Patrick's Day!


Supplies:

Stamps - It's a Wrap Holidays - SU
Ink - Garden Green
Paper - Whisper White, Garden Green - SU
Accessories - Circle Punch - 1 3/8, Cricut Cartridge - Paper Dolls Dress Up - Pg. 40

I usually use York's Peppermint Patties but they started wrapping them in square papers, so I looked around and found another brand called Pearson's.  They worked out great!  I had to taste them for quality, of course, and they were yummy!  They were easy to assemble and $1 cheaper a bag!

I cut my shamrocks out at 1 inch and put them on my punched white circle with a mini glue dot, and then I used a larger glue dot to adhere that to the pattie.  Make sure that you adhere it on the flat side.  I then added some nuggets to my container that I decorated with my labels which I had stamped with the St. Patrick's Day stamp.  I also put in some plastic "good luck" coins that I picked up at Michael's for some added decoration.

I hope everyone survived this nasty week!  We were spared alot of snow but still got heavy winds and terrible weather! We woke up this AM to about 2 inches of snow and it is still snowing!   Have a great weekend - and hurry Spring!!

Thanks for stopping bye,
Nancy, Rachel & Sarah

Sunday, March 3, 2013

St. Patrick's Day Good Luck Treat

I thought I would show you one of the items I'm making for my daughter to take to work for St.Patrick's Day.  I saw this stamp at a Stamp Show and fell in love with it.  It's made by Toomuchfun.  I purchased a few of their stamps that day and have used this one alot.


Supplies:

Stamps - Toomuch fun, Good Luck Stamp
Ink - Black Stazon
Paper - Brushed Gold - SU
Accessories - Scissors

I was able to stamp several of these treats on one piece of paper.  I found out the hard way that you have to give the ink more time to dry than normal before cutting them out. I think it's because of the texture of the brushed gold paper.  After cutting them out, I stamped my good luck in the circle.  I can't remember where I got this stamp from.  It's a clear stamp which makes it easy to place.  Place your little treat inside.  I usually put  a chocolate wrapped gold coin, and then fold it up like a box and you're done!

Well, they say March comes in like a lion and goes out like a lamb!  They are forcasting a snowstorm for midweek, but I'm hoping they're wrong!  Hope you have a great week!

Thanks for stopping bye,
Nancy, Rachel & Sarah

Friday, February 8, 2013

Valentine Treat Holders

Here is the last of the Valentine goodies that I made for my daughter to take to the Wellness Center.  These are so great!  They can be used for any occasion by just changing up the papers and embellishments.  This was the first die that I purchased from SU and I have really got my $$$ worth out of it!


Supplies:

Paper - Real Red, Pretty in Pink, lots of scraps - SU
Ink - Real Red
Stamps - PS-I Love You, It's a Holiday Wrap - SU
Punches - Scalloped Punch, Various circle punches
Accessories - Two Tags Die, 1/4" ribbon, Dimensionals, score tape, snack bars

I got this idea from  Card Corner by Candee. On her blog she mentioned a youtube video from Stamp with Dawn .  This treat holder came together really quick.  I stamped and punched alot of the Valentine sayings first, put them together and then made my holders.  This is another great way to use up your scraps of paper that are lying around!  The hardest thing for me when putting these together was tying the bows and not eating the candy!  I put a bowl of nuggets that I had covered with the labels that I stamped with a cute little Valentine bear in the center of the tray for decoration.  I will definitely use these treat holders again for other holidays.

Well, it's snowing!! It looks like we are going to get alot of the "white stuff".  The girls have early dismissal so they will be happy!  Hope you have a great weekend!

Thanks for stopping bye,
Nancy, Rachel & Sarah

Saturday, February 2, 2013

Valentine Nurse Purse

I have been going back and forth for months trying to decide whether I should buy SU's Petite Purse Die.  Then while checking out some pictures on the web from Leadership I saw an example of the petite purse but for a nurse!  I just fell in love with it and ordered the die right away. I thought what a great Valentine goodie for my daughter to take to the hospital for the nurses in her department!


Supplies:

Paper - Whisper White, Real Red - SU
Stamps - Teeny Tiny Wishes, It's a Wrap Holidays - SU
Accessories - Petite Purse Die, Glue Dots, Score Tape
Punches - 3/4" Circle, Word Window and Itty Bitty Shapers Punch Pack
Embellisments - Twine

I can't say enough about this die.  It was so easy to use and it cut the paper like butter.  I cut my 8 1/2" x 11" paper in half on the 11" side which enabled me to make two purses out of one sheet of CS.  I used my score tape on the two sides and the purse was together!  Since I was making alot of them, I used my mini glue dots to put the handles on instead of using brads.  I stamped my sentiment and tied it on the handle with my twine.  The example that I saw on the web used a large red cross sign, but my friend Denise let me use her cross punch from the punch pack which I mounted on a 3/4" circle of whisper white paper.  I used the Valentine holiday stamp on Avery labels and put them around Nugget Bars to add to the goodies.  I put two nugget bars in each purse and there is still room for more which surprised me.  I just loved how these purses came together.  I will definitely be making more of these for different occasions.

Well, it is still very cold and windy here.  I am definitely ready for spring!  Have a great weekend!

Thanks for stopping bye,
Nancy, Rachel & Sarah

Monday, January 21, 2013

Valentine Doilies

I saw these doilies on Inking Idaho and thought they were so cute and decided to make some.


Supplies:

Paper - Doilies - 5 1/2"
Ink - Real Red, Pretty in Pink - SU
Stamps - Happy Valentine Day - Michael's
Accessories - Cording, small heart punch, dauber, plastic needle

Inking Idaho used the SU doilies which are smaller, but I had some 5 1/2" ones on hand. She also used twine, but I decided to use my cording instead.  I stamped my greeting on the front of the doily and then put that one together with another one with  the backs facing each other.  Then I just stitched in and out of the doily holes going around the inside circle with my cording.  I found using my plastic needle made life alot easier.  Before closing the circles, I filled the centers with 4 hershey kisses and then tied the cord off with a bow.  I adhered a small red heart that I had punched out, and used my dauber and went around the edges of the doilies on both sides and it was finished! 

I thought these would be cute for the girls to give out to teachers, bus drivers, etc.  It's going to get really cold here  - hope you keep warm and have a good week!

Thanks for stopping bye,
Nancy, Rachel & Sarah

Friday, January 18, 2013

Sour Cream Packs

I have been working on some treats to send to the hospital with my daughter for Valentine's Day. This is the first tray of goodies.


Supplies:
 
Paper - Valentine DSP, Real Red, Pretty In Pink - SU 
Stamps - Animal Crackers - SU, My Heart - Michael's
Punches - Heart, Large Scalloped, Circle - SU
Accessories - Embossing Folder - Swiss Dots - SU
 

 I made a bunch of sour cream packs (SCS has a tutorial for this) using some Valentine paper and decorated them with a cute stamp from SU. I love this stamp set!  Rachel and Sarah have used this set alot. After coloring them, I punched them out with my large scalloped punch and popped them up with a dimensional. I always try to decorate the tray with a centerpiece. The Valentines were made using my heart punch. I punched out 8 hearts for each flower, ran them through the embossing folder and glued a pipecleaner in the center for the stem and then glued them together. I then colored and punched out some decorative stamps I had for the center of the flowers and put them into a paper milk box container for some stability. Loved how turned out.

It's hard to believe that Valentine's Day is around the corner - the holidays are really going fast!  Hope you have a good weekend!

Thanks for stopping bye,
Nancy, Rachel & Sarah

Monday, January 14, 2013

Valentine Jars


I decided to start making some Valentine items. I had some plastic jars left over from another project and filled them with some nugget bars. I made some belly bands from some Valentine paper and secured them in the front so the seam wouldn't show. I found these cute pop-up monkeys in Michael's on sale and thought they fit right into the Valentine theme with their little hearts! To finish it off I tied some ribbon on the top rim! I thought they turned out cute!


Hope your week is off to a good start!  Mine would be better if  Blogger would fix their upload process for Internet Explorer.
 
Thanks for stopping bye,
Nancy, Rachel & Sarah


Friday, December 28, 2012

Medallion Christmas Tree

I didn't want to forget to post this great little tree!  We made a few of these and I loved how they turned out!  Fran Sabad did a great video on how to make them.  If you have some energy left after this week give it a try!


We finished the trees by placing them in a small pot trimmed with some ribbon, and then decorated them with some bows and small roses that I had in my stash.  I also had some small plastic stars that were just the right size, so we used them instead of making some out of paper.

We had a great Christmas and are looking forward to New Year's!  We had 2 inches of snow Christmas Eve.  When we left church it was snowing - it was beautiful!  We are expected to get another few inches tomorrow and it is getting cold!!!!  Have a great weekend!

Thanks for stopping bye,
Nancy, Rachel & Sarah

Sunday, December 23, 2012

Hershey Christmas Trees

I always have Christmas at my house the Sunday before Christmas. This year I wanted to make a favor to put on the table for each person by their place setting.  While looking through Youtube, I saw this adorable video on how to make Hershey Christmas Trees  and knew this is what I wanted to make.


I was really surprised how quickly they came together.  Unfortunately, when you take out the candy the tree comes apart, but I salvaged these and put more candy back in them to take a picture which I hadn't done.  They were a big hit and I will definitely put them on my "keep" list.

We had a great time!  We always take the girls to church Christmas Eve and then have dinner at my daughter's and then on Christmas Day.  We had alittle snow yesterday and more is forecast for the next few days so it will be a white Christmas!

Thanks for stopping bye,
Nancy, Rachel & Sarah

Monday, December 17, 2012

Christmas Ornaments

Every since the SU catalog came out and I saw the cover with the Christmas ornament  on it, I knew that I wanted to make them - along with everyone else!  There are so many how-to videos on the web and I think I watched them all!  I did make one ornament with the stamps and I loved how it turned out, but I knew if I wanted to make a bunch of them that wasn't the best way to go.  I decided on using DSP scored every 3" and then folded together before putting through the Big Shot with the ornament die.  I found that I could die punch 5 out lenghwise which gave me the 20 cutouts that I needed.  Even better was that I could place the smaller die cut inbetween the larger cutouts to produce those 20 cutouts which enabled me to make an ornament out of one 12" x 12" piece of DSP!  I was in my glory!  I use scraps of DSP to make my rosettes for the center of the ornaments using my Cricut Cart - Ribbons & Rosettes.


I loved getting out all my embellishments and adding the finishing touches!  My next decision was how I was going to wrap them up.  I wanted to keep them lying flat and saw a great tutorial for a box to put them in on Stamp & Scrap withFrenchie.  I decided not to use the window sheets as I had too many to do and made the box for the top as well in a different color and stamped and embossed a Christmas wish.

To add a personal touch, I stamped a Merry Christmas greeting and punched it out using my large scalloped punch.  I wrote the year on it and a personal message as well and adhered it on the back of the ornament.  I was so happy with how they all turned out!  I did a dozen of them and already gave some out.  Every year I try and give my daughters and granddaughters some type of ornament for them to keep.  I love quilling and have made them several ornaments in the past.  This year it was the angels and these ornaments!

I would definitely recommend you make these ornaments!  I think the angels and these ornaments were my favorite things I made this year.  One note to myself - start earlier next year! Hope you have a great week!  If you have any questions, please feel free to email me or leave a comment. 

Thanks for stopping bye,
Nancy, Rachel & Sarah


Tuesday, December 11, 2012

Christmas Cocoa Pack

Over the weekend I finished making up these cocoa packs for my daughter to take to the Wellness Center for the clients.  Every holiday I make something and when I saw this video on Dawn's Olchefske's blog I knew this was what I was going to make this Christmas.


Supplies:

Stamps - Scentsational set with matching Holiday Collection Framelits Bundle - SU
Ink - Real Red, Garden Green, Chocolate Chip - SU
Paper - Chocolate Chip, Real Red, Crumb Cake, Whisper White, DSP - SU
Accessories - Big Shot, Scoring Tool, Dimensionals, Hot Cocoa Packs, Candy Canes
Emblishments - Rhinestone Jewels, Sweater Trim - SU

I fell in love with this stamp set and die when Rachel was using it to make her Board Game for school.  I also used my cricut cartridge George and Basic Shapes to make the 2 1/2" circles and candy canes for the stirring sticks.  You can't have hot cocoa without candy canes!  This is the first time I used the sweater trim and I really like it.  Very easy to use and to tie a bow.  Hard to believe that Christmas is just 2 weeks away!

Hope you have a good week.

Thanks for stopping bye!
Nancy, Rachel & Sarah


Thursday, December 6, 2012

Christmas Angels

I fell in love with this project!  I love making angels for Christmas and when I saw this tutorial by Stamping to Share I knew I was going to make them - lots of them! 


Supplies:

Paper - DSP, Very Vanilla - SU, thinner paper
Tools - Big Shot Machine, Scallop Circle Die, Paper Doily Die and Scallop Circle   Punch - 2 3/8"
Embellishments - Twine, Buttons ( I found some with glitter in them), ribbons
Misc. - Ornament Hangers, Beads, Hot Glue Gun

After watching the video, I made my first angel and then was addicted and kept on making them.  These are all I have left as every time I turned around 1 or 2 were missing!

The only thing that takes time is taking out all the paper scraps from the doily die as mentioned on the video.  I found thinner paper than SU's in my stash and it worked much better, but I still had to run it through the Big Shot several times.  Since I wanted to make a bunch of angels, I decided to make all my doily die cuts first.  Then the rest of the process went quick.  I had a thought to use paper doilies but the ones I had were way too big.  I hope you enjoy this project as much as I did.  It is so great to see what starts out to be a plain piece of paper turn into something so cute! Have a great weekend!

Thanks for stoppig bye,
Nancy, Rachel & Sarah