Wednesday, December 18, 2019

Christmas Mini Wreaths

Well, it looks like I am getting the Wellness Center's Christmas goodies done just under the wire!!  I finished them up last night, as I need to get them to my daughter tomorrow.  I saw these on a youtube video during the summer - yes, I waited until now to do them - and thought they were so cute and knew the clients would love them.  There are a lot of videos making different kinds you can check out.  These are made with plastic shower hooks and evergreen stems. 


The ones I made took 4 stems to wrap around the hook using hot glue to secure them.


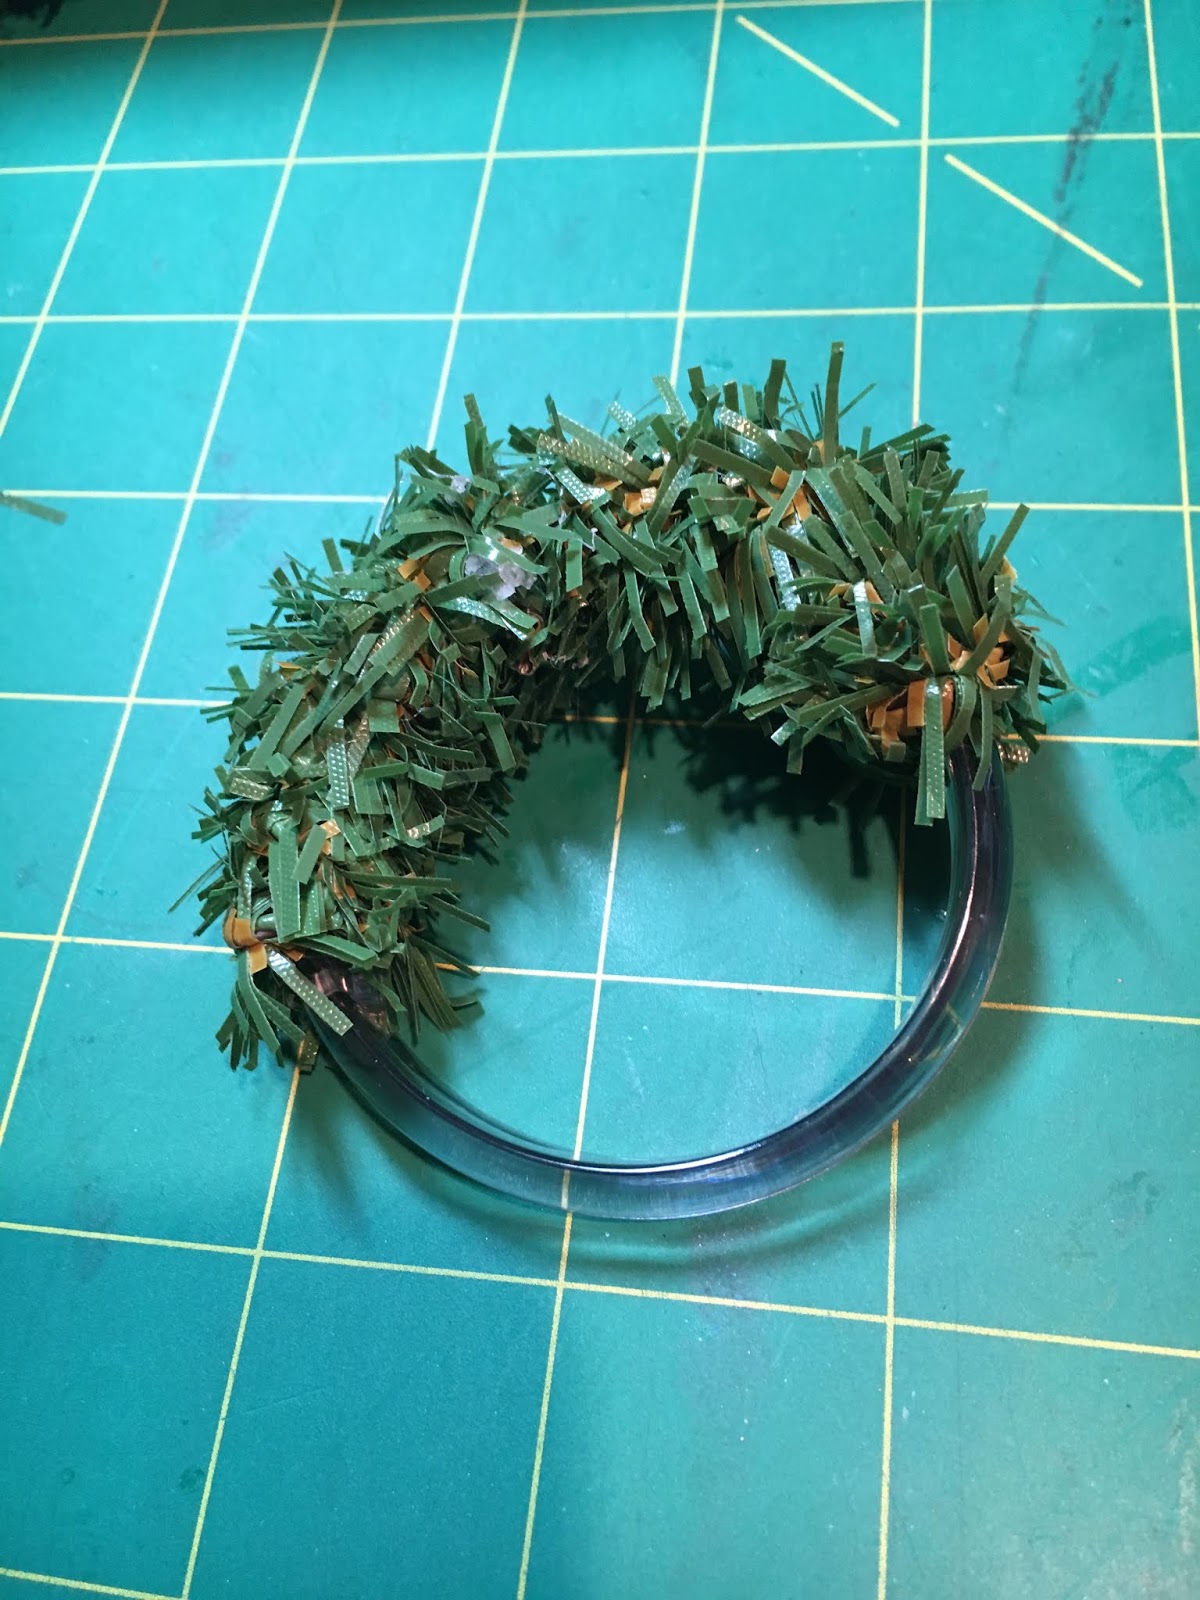
I ended up making 25 of them.  It took about 10 minutes to wrap one. 


You can decorate them in various ways.  I glued on some gold bows I had in my stash and then some gold beads for some decoration.  I tried gluing some colored beads I had, but I felt they were too small and didn't have any larger ones.  I also tried wrapping some seed beads I had in my stash but didn't like how the string was showing in the back so just went with the gold beads.


Here is one that I made for Jennifer's doll house.  She is decorating it for Christmas and I thought she would like to hang this on the front door.


Here is the tray all ready to go to the Wellness Center.


On a personal note, my daughter Jeannie, Jennifer, Joe and myself were down at Lancaster for the weekend.  This was their Christmas present to us along with tickets to the America Music Theater to see the Christmas program - Joy to the  World.  We had so much fun!  We had never gone to that theater before.  It was so pretty!


On Monday, Jennifer had her Christmas Concert which we didn't get to because of the weather and now she is home with slight pneumonia and on antibiotics for two weeks!!  Hopefully, it won't go through the family like it did one year!  Well, now I have a pile of Christmas presents that need wrapping and the sun is out and it is snowing!!   The days are flying by!

Thanks for stopping by,

Nancy


Wednesday, December 11, 2019

Christmas Card - Gleeful Wishes

Before I start with my project for today, I wanted to let all those who are members of Splitcoaststampers know hat I was chosen Favorite Stamper of the week.  I was so surprised!  I didn't even know about this feature.  They pick someone and then they go to your gallery and chose one of your cards to CASE.  I was so pleased and loved seeing their cards.  If interested, you can go to their website and under Featured Gallery type FS670 which will take you to their cards.  It was so much fun!

I'm back with another Christmas card.  I am loving Heartfelt Creations collections.  To make this card I used two of their collections - Candy Cane Cottage and Candlelit Christmas.  This is a 7" x 5" card made with thick Whisper White CS.  I used some of the DSP to cover the front and the Intricate Swirl Frames Die in Whisper White as well.  I adhered a pretty panel from my DSP  inside the frame.


I used the stamps and dies for my ginger bread house, candy canes and cute penguin which I popped up with dimensionals.  I used clear white glue and glitter to accent the snow, frame and card.  I made my poinsettia using Real Red and Olive Green for the leaf and added some prills for the center.  The sentiment I used was also from the DSP matted on a piece of Whisper White.


For my inside sentiment, I used SU's Still Scenes stamped on the collections DSP.  I really love making these cards. 

On a sad note, my daughter had to put their dog Willow to sleep.  When her elderly neighbor passed away she took Willow in because she didn't want them to put her in the pound.  Every since that day, she has always repaid her with her love and loyalty.  After Jennifer was born, she never left her side.  I remember when feeding her bottle, Willow was always by my side watching. She never left Jennifer out of her sight.  The night the bear appeared in their yard, she put herself between Jeannie and Jennifer and scared it off.  They did everything they could to save her but did not want to see her suffer.  There was nothing more they could do.  The Vet came to the house so she could pass at home. She was the best dog I have ever seen and will truly be missed.


I have hundreds of pictures of Jennifer and Willow, but I always liked this one.  Jennifer loves to go to the playground and no matter what she was doing Willow was always right by her side.  Rest in peace Willow!!

Thanks for stopping by,

Nancy


Tuesday, December 3, 2019

Christmas Starry Night Poinsettia Card

I am looking outside my window watching the rain/sleet come down!  Oh, Goodie!!  We are suppose to get snow tonight into tomorrow.  Depending on who one listens to the inches vary!!  Oh, goodie!!  One positive thing is that I will have some time to spend in my craft room.  Over the weekend, I finished a Christmas card I had started using some dies from the Heartfelt Creations.  The card size is 6" x 6" which I hardly ever make.  I decorated it with a piece of DSP from their Candlelight Christmas Collection.  Then I die cut 2 pieces from  their Starry Night Decorative die and layered them over the DSP.  I then sprinkled some glitter in top of the dies.  I love how this die presents itself.


I then added my sentiment from the Blended Seasons stamp set from SU on Whisper White and layered that on  a piece of Old Olive.  I used the Heartfelt Creations Christmas Poinsettia and Holly Stamp set and dies to create several flowers which I mounted on the base of the card.


For my inside, I used another piece of DSP from the same Collection, and the Create Cut Mat 2A from Heartfelt Creations which I stamped my sentiment from SU's stamp set Snow is Glistening.  I am so enjoying making these Christmas cards with these stamps and dies.  I hope everyone that is in the eye of the storm is safe and enjoying some good leftovers from Thanksgiving day.  We were in NJ at my daughter's for the day and had a great time.  On Friday, they went to the grand opening at Seaquest Aquarium in Woodbridge Center and had a wonderful time.  We met up with them yesterday and did some shopping and had a yummy dinner.  Everyone is home now safe and sound waiting for the storm to pass.

Thanks for stopping by,

Nancy


Monday, November 25, 2019

Ginger Bread Gift Box

We had such a lovely day here with temps in the 50's!!  Tomorrow it is going to be the same so we have a lot of things planned.  This weekend was not so nice so I finished up the gift boxes I made for Jennifer's teachers.  I just loved how they turned out.


I made them using the Heartfelt Candy Cane Cottage Collection again.  I used Craft Paper and stamped them out using Frost White ink and embossed them with some Crystal Clear Glitter.  To accent some thicker snow, I used some dry white glue and sprinkled some glitter for more snow.  I then just die cut plain houses for the back of the Ginger Bread.  For my  gift box, I used, Heartfelt Creations Gift Box and Mini Snow Flakes collection.  I just put the box together and glued on the front and back of the Ginger Bread houses .


I then decorated them with large and small candy canes, Christmas Trees and a Merry Christmas sign.  All my daughter has to do now is put in the goodies, wrap them up in a plastic bag and tie them off with a bow.


I'm so glad they are finished, as I have to start working on the goodies for the Wellness Center.  It seems that once Thanksgiving is over the next month flies by.  Everyone here in the Pansy Patch wishes you and your family a very Happy Thanksgiving.

I entered this post at CardzTV Anything Goes Challenge #103.

Thanks for stopping by,

Nancy


Thursday, November 21, 2019

Christmas Shaker Card

I have recently purchased some Heartfelt Creations stamps and dies and I love them.  They have a lot of videos using their products which is so helpful.  One - video - that Andrea did was making this adorable shaker card.  I knew immediately that I wanted to make this card for Jennifer.


I used their Candy Cane Cottage Collection to make this card.  This was the first time I made the poinsettias and I was really pleased how they turned out.  I used their Heart of Joy die so it looks like a shaker snow globe.  The shaker part is made with layers of  the circle/scallop dies with some cute little figures inside having a good time in the snow.


For the inside, I just added a strip of DSP on the bottom and left the rest blank.  I can hardly wait to give it to her.  I'm in the process of making some cute Gingerbread house gift boxes for her to give to her teachers.

Thanks for stopping by,

Nancy


Tuesday, November 19, 2019

Jennifer's Thanksgiving Card

Well, I got all my Thanksgiving cards put in the mail today!  I saw this really cute card made by -Debbie Henderson. She makes so many nice things and her videos are so detailed.  I love visiting her blog.  When I saw her card with the 3-D pumpkin, I knew I wanted to make it for Jennifer.  She loves my pumpkin punch and is amazed that she can use it for an apple as well. 


I used SU's Old Olive CS for my base card with my first layer in SU's Pumpkin Pie.  My Whisper White CS was cut  3/4" x 3 1/2" and I ran it through my embossing folder and  then glued some scrap DSP on the bottom.  I used my Stitched Nested Labels Die to make the next layer in Old Olive.  The stamp set that I used is SU's Harvest Hellos.  I punched 5 pumpkins out and glued them together as the video showed using some ribbon for the pumpkin stem and twine for the bow.  My sentiment was stamped on 1/2" Pumpkin Pie CS and glued down along with some leaves I fussy cut out.


For my inside sentiment, I used an old $1 stamp from Michael's and put some Washi Tape on the bottom to dress it up.  It is hard to believe that Thanksgiving is next week. 

Thanks for stopping by,

Nancy


Friday, November 15, 2019

Thanksgiving Card

Here is another bunch of Thanksgiving cards that I put together.  I love SU's Harvest Hellos stamp set and punch.  It is so perfect for making cards for this holiday.  These cards came together so quick and easy.


I used More Mustard for my base card and layered it with some DSP.  This paper matched the punch perfectly.  I used the reverse side of the DSP for the strip on the bottom of the card.


I then punched out a pumpkin and stem and popped it up with dimensionals and used some twine to make a small bow for the stem.  My sentiment was stamped on Crumb Cake CS and cut out with the Stitched Nested labels Dies.


For my inside sentiment, I used Pumpkin Pie ink on Whisper White CS with the Count My Blessing stamp set by SU.  The wheat is from SU's Gather Together stamp set in Chocolate Chip colored in Daffodil Delight.


Again, I stamped the back of the envelope.  I love doing this.  We are going to try and get outside today as the temps are in the 50"s!!  Hope everyone has a great weekend!

Thanks for stopping by,

Nancy


Monday, November 11, 2019

Christmas Advent Calendar

 I have a quick post for you today.  It is going to be almost 60 degrees here today before a nasty cold front arrives, so we are going to go out and enjoy the nice weather.  If you are a regular on my blog, you know I decorated SU's Christmas Advent Calendar for Halloween/Jennifer's birthday.  She loved it and enjoyed opening the little boxes every day to see what goodies were inside and counting down to her birthday and Halloween.  I told her I would do the same thing for Christmas.  Over the weekend, I decorated the other side of the boxes for Christmas.


SU made this project so easy with all the little stickers and decorations.   I didn't have to make the front pieces on this side - only glue them in place.  I definitely got my money's worth on this project!  Now for the hard part - finding goodies to fill the boxes up! 

Thanks for stopping by,

Nancy


Saturday, November 9, 2019

Thanksgiving Card

Well, I have no idea where this week went!!  I decided I had better start making some Thanksgiving cards before the big day is here!  If you have read my blog before, you know that I feel Thanksgiving is the forgotten holiday.  Everyone is so anxious to get into Christmas, they neglect this wonderful day.  My neighbors are already decorating their houses for Christmas!! 


My first set of cards came together pretty quick and easy.  I used SU's Soft Suede CS for my base and made my first layer with some DSP.  I love this paper but decided I had better cut it up if I want to buy any more in the future. 


I used SU's Thanksgiving stamp and embossed my sentiment on another piece of Soft Suede and made a small bow with some twine.


I added some small sparkles and the front was done.


For my inside sentiment, I used SU's Count My Blessings stamp set with Pumpkin Pie ink and colored the leaves with my markers. 


Lately, I have been stamping the envelope as well.  I think it just finishes the card off.  It was 22 degrees when I woke up this AM.  All my pretty flowers are all finished except for a few of my mums and the leaves on the trees are all gone.  I guess we can say officially winter has arrived.  Have a great weekend!

Thanks for stopping by,

Nancy

Tuesday, November 5, 2019

Happy Birthday Shaker Card

Well, it has been a busy week so far.  We have been driving back and forth to NJ yesterday and today to watch Jennifer, as she had early dismissal for teacher's conference.  We had so much fun but hate driving home in the dark.  I forgot all about posting this birthday card that I made for my friend. 


It is made with Heartfelt Creations Sugarspun Collection paper.  I just love their products and this collection is no exception.  I used SU's Daffodil Delight CS for my base card and one of their DSP for the layers.  I cut out the center of one and then created a shaker card using the same design for the base.  I added a bunch of prills and sequins for my shaker card and a cute little greeting.  I used the Starry Night Decorative die from Heartfelt Creations in Whisper White CS to decorate the top of the card.


For my inside sentiment, I used SU's Better Together and punched out a "goodie" from the DSP.  I was so pleased how it tuned out.  I have been trying to clean up my craft room of all the Halloween stuff and get ready for Thanksgiving let alone Christmas.  It will be here before we know it.  They are actually forecasting some light snow here Thursday into Friday!!  UGH!!

Thanks for stopping by,

Nancy


Thursday, October 31, 2019

Happy Birthday Jennifer!!

Well, it is hard to believe that Jennifer is 6 years old today!  It seems like only yesterday that we were rushing to the hospital.  She is celebrating her birthday on Sat. with all her friends at Sky Zone and her family party will be held after that, so she will have a busy day.  If you follow me, you know that when I make her birthday card I put the number of pumpkins on her card that is her new age.  This will be interesting as the years go by!


For this year's card, I used Old Olive for my card base with my first layer of Pumpkin Pie.  My second layer was Old Olive again and I punched out a circle so my number 6 could show through.  I used my Large # Framelit die and cut out 4 and glued them together in Basic Black and put some gloss on them.  I placed 6 pumpkins around to show her age and tied up some ribbon on the bottom on the layer.


For my inside sentiment, I used my Perfect Pairings stamp set from SU and used another larger pumpkin sticker as well.  It came together pretty quick.  The kids are going to have to wear their raincoats tonight as it is pretty nasty around here.  Most of the towns changed Halloween to tomorrow but ours is still on for tonight. 

Thanks for stopping by,

Nancy


Friday, October 25, 2019

Masculine Birthday Card

I  hope your week is going well!  I had to stop with my Halloween goodies and make a birthday card.  As I typed the word masculine, I thought to myself that this card could be used really for anyone.  It just doesn't have a lot of bows, etc.  I saw this card on Pinterest and thought this was just the ticket.  I have to say I spent more time looking around for the DSP than making the card.  I thought - really, it is only two little pieces of paper, but I had a hard time finding something where the pattern was correct. 


I used SU's Old Olive and cut it 11" x 6" and scored it 2 3/4" x 8 1/4".  I also cut a piece 3" x 3 1/4".

I cut the following pieces from the Gold Foil:

1 - 5 1/2 " x 5"
2 - 2 1/4" x 5 3/4"
1 - 3 1/2" x 3 3/4"

and some extra for the Happy Birthday Thinlet die.

I then cut a Very Vanilla piece - 5 1/4" x 4 3/4" and two pieces of DSP - 2" x 5 1/2"


For my inside sentiment, I used SU's Better Together stamp set.  I have gotten more use out of this stamp set!  I added in a few sparkles and the card was done!  I'm going to make a 6" envelope for it as well once I pick out the paper for it!! LOL!  Have a great weekend.

Thanks for stopping by,

Nancy


Monday, October 21, 2019

Halloween Mini Pizza Boxes

I hope everyone had a great weekend.  Ours was a mixed bag.  Saturday it was beautiful and Sunday nasty and raining.  Jennifer and her Mom came up on Sunday, and we put together her Halloween goodie bags for school.  She has officially become a "Daisy" with the Girl Scouts and has a Halloween party tonight at the local church, so she took a bunch of the Ghost lollipops to hand out.  Boy is she excited!!  Plus she was pleased to show us her spelling test that she got 100%.  So Poppy reached in his pocket and handed out four quarters. I couldn't believe the words she has to spell in 1st grade.  Definitely, not like the old days.

She had asked me if I would make some Halloween goodies for her teachers, so I went through my stash and found some mini pizza boxes and decorated them for Halloween.


These came together so quick and easy.   I put some Pumpkin Pie CS on the top and then layer it with some scrap DSP I had. 


I then used SU's stamp set Harvest Hellos and punched out some pumpkins and stamped my sentiment from the Spooky Treats stamp set.  I decided to emboss them and added my stem and leaves.


I used an Action Wobble for my pumpkin to make it jiggle!  I felt it needed something else, so I used my Heartfelt Creation Leafy Accents die to cut some leaves out of orange glimmer paper.


I think it added such the right touch.


My daughter is going to put some fall candle tarts inside for a special treat for the teachers.  I love how these adorable boxes turned out.  I'm sure I will get a lot of use out of this stamp set as you can also stamp an apple - which will be perfect for school projects.

Thanks for stopping by.

Nancy


Monday, October 14, 2019

Crayola Decorated Pumpkin

I hope everyone that was off today had a great day.  It was beautiful here - the temps were close to 80 degrees!!  I had all the doors and windows open and loved it!  Jeannie and Jennifer surprised us by popping in for a visit and of course we had to do a craft.  I had seen this cute video on pumpkin decorating over at - Hedgehoghollow - and decided we would try it out.  Last week I purchased this fake pumpkin over at Michael's and Joe spray painted it pink over the weekend. Then I got a few crayola crayons and took the paper off and was ready for Jennifer's help.


I was surprised how easily the crayons melted.  I was afraid Jennifer would get burned with the heat gun, so she directed what color and where I should melt them.  If I have time, I may go and get a small black pumpkin and melt some gold and silver crayons. 

Thanks for stopping by,

Nancy


Wednesday, October 9, 2019

Mummy Halloween Card

Well, thanks to the nasty weather and rain I spent some more time in my craft room.  I saw this adorable card over at Pinterest and decided to make it.  I have been trying to use up my old DSP before I buy anymore and this card helped with that effort.


I used SU's Pumpkin Pie CS for my base card.  For my first layer, I cut Basic Black 5" x 3 3/4" and my DSP 4 3/8" x 3 5/8".  For my second layer, I cut Basic Black 3 1/2" x 2 1/2" and  my DSP 3 3/8" x 2 3/8".


I used the Cookie Cutter Halloween Stamp set for my cute mummy and punched it out with the matching punch.  I dressed him up with some glitter paper and some bats from the Spooky Fun stamp set and dies.  My sentiment strip was cut in Smoky Slate.


For my inside sentiment, I used an old Michael's stamp and some washi tape.  I love this old set and I'm glad I dusted it off! 

Thanks for stopping by,

Nancy


Monday, October 7, 2019

Skeleton Halloween Card

I hope everyone had a great weekend!  For the start of our week here in PA it is a miserable day with rain, dampness, etc.  The weather for most of the week is the same, so it will be good for staying inside and crafting.  Over the weekend, I made another Halloween card.  My stamping friend, Martha, send me the Halloween Paper Pumpkin Kit.  She only likes to do the cards and knew I would have a use for the project.  It is really cute.  It had 20 little boxes for Halloween treats that came together pretty quick.  Jennifer was up Saturday and decided she wants them for her friends to take to school for Halloween treats.


She and Mom took them home and will put some goodies in them along with some Halloween Straws  she and I found at Michael's and some favorite Ghost Lollipops that I make every year.  I have made a bunch of these for my daughter to take to work at the hospital as well.


These straws have cute little pumpkins and cats that I ended up gluing on them to keep them from moving around.


I CASEd the alternative Paper Pumpkin project making a cute card with some leftover skeletons.  It was so quick and easy and I loved how it turned out.


I used SU's Pumpkin Pie CS for the base card and stamped the skeleton stamp on my first layer.  I had extra webs and used them as well as the cute little sentiment stamped in Gorgeous Grape.


I backed the layer with some foam paper to make it stand out.  For the inside, I used 2 stamps I had in my stash from Michael's.


I even stamped the spider web on the envelopes.


Before Jennifer went home, I gave her the Halloween/Advent calendar I had made for her.  She loved it!!


Can you tell that I like Halloween!!  I could probably make Halloween goodies all year long.  Do you have good memories of Halloween?  As soon as school would let out, we would start treat or treating until the town Halloween Parade started and all the kids would line up at the end and walk the Parade route all dressed up in their costumes.  It ended up at the local park where there were free hot dogs and drinks for everyone.  Good memories!  What memories do you have about Halloween??

Thanks for stopping by,

Nancy