Showing posts with label Crafts. Show all posts

Sunday, February 15, 2026

Valentine's Day Purses

 I woke up this morning happy to see the temps still in the 40's!!  It has been such a wonderful warm weekend.  We are suppose to get some more snow tonight into tomorrow but with the temps the next 2 weeks in the 40's I'm hoping to see most of the snow melt!! We had a quiet Valentine's Day as half the family is still sick with colds.  I saw this cute craft project over at Brenda Quintana's blog and decided to make some for all the girls!  


I promised myself I wasn't going to buy any more DSP, but I fell in love with SU's new Made With Love DSP and their heart doilies.  The little gift bag in the foreground is for Juan.  


For the flap, I used Real Red and Pretty and Pink  CS from SU.  The doilies come in both white and red colors.  I actually used up some old ribbon I had on hand for the handle


On the back side of the circle, I used SU's Heart to Heart Stamp set and their Sealed With Love die set for my glitter heart.


This what the inside looks like where it holds 2 Lindor Truffles.  I used some velcro dots for the closure.  I think these would be so cute to make for a Mother's Day tea as well.  

Thank for stopping by,


Nancy


Wednesday, February 28, 2024

Gift Bags for Valentine's Day

 I almost forgot to post these adorable gift bags that I made and put in the goodie bags for the kids for Valentine's Day.


These came out so cute!  These smaller bags are made especially for gift cards!


The dies are from Concord & 9th.  The set also has a larger bag that will fit an A2 card which I'm sure I will be using in the future.  I used some left over Valentine DSP scraps I had on hand.  The dies have different handles you can use along with a stamp set of sentiments. Notice the pansy candy that Rachel and I found at the Vermont Country Store.  All their candy is yummy!!

Thanks for stopping by,


Nancy


Saturday, December 30, 2023

Christmas Tree Table Gifts

 I hope everyone had a wonderful Christmas.  We had everyone here for Christmas with  lots of food, presents and fun!  I saw a video using  SU's Merriest Tree Bundle on Brenda Quintana's website and knew I wanted to make some!


I made these for the table and extras for some friends.  


I made some in Garden Green CS and then the rest in Old Olive.  I used some gold glimmer paper for the star and used a lot of left over gems I had in my stash to decorate the tree. 


There are two triangle boxes that fit together filled with goodies and two trees. One plain one on the back and the decorated one on the front. I was really happy how they turned out.  

Thanks for stopping by,


Nancy


Sunday, February 12, 2023

Valentine Bear Hugs

 I haven't made any cards recently but finally finished up making these adorable bears.  I like using sewing dies and saw these cuties a few months ago and cut out the felt pieces so they were already for sewing together.  While Joe was having his surgeries it gave me something to do to make the time go by.  I used to do a lot of embroidery but my hands don't work that well anymore.  LOL!!  I made one for each of the girls and of course little JJ to give with some treats for Valentine's Day.  I also saw on youtube where they were made for Christmas as well.


Here are the cut pieces ready to be sewed together.


I used the Bear Hugs die set from Ellen Hutson for the bears and the Candy  Hearts die set from Lawn Fawn.  I sewed in a string so they can be hung.  I loved how they turned out.


It's hard to see in the picture but the little hearts have different sayings, ie. XOXO, I Luv Y, etc.

I sewed a french knot for the eyes and hot glued the nose, cheeks and hearts.  


I have to put their goodie bags together.  I saw this cute little bear and got it for JJ and a box of  animal crackers.  They don't make it with a string handle anymore and took the animals  out of the circus cage.  I guess the sign of the times. 


I almost forgot to post these cute little Valentine notes I made from SU's old stamp set Love Notes to put in their goodie bags.  I have used these goodies so many times.

I have to find some time to get back into the craft room.  I miss it.  Life gets in the way.  I want to thank everyone for their thoughts and prayers for Joe.  He is doing much better and can finally drive again so as he says "he is released from prison" and is on the move again!  And a big "Thank You" to Rachel for all  her help!  During Christmas break Jeannie and Jennifer came down  with Covid as well so we are calling this Covid Christmas. We finally were able to get together the end of January to celebrate.  We won't forget this Christmas for awhile, but are so happy that everyone came through and are feeling back to normal.  I hope to see you again soon!

Thanks for stopping by,


Nancy


Tuesday, November 30, 2021

Felt Christmas Mittens

 I saw this video awhile ago and I fell in love with these adorable mittens and decided to make some for the family this Christmas.  The die set is from Memory Box - Plush Frosty Mitten Style 99308.  They have additional dies that can be used with this die to decorate the mittens, but I only used this one.  It was hard to photograph them, but I finally decided to hang them on some skewers I had.  When I was photographing them, the song about the Three Little Kittens that washed their mittens and hung them out to dry came to mind!  LOL!


I thought it would be so cute if I tied these mittens on the presents for the family.  


I had a bunch of different colored felt in my stash, as well as embroidery thread so I was all set to go.


I also used some buttons in my stash as well as some of SU's Christmas Decorative Designer buttons.  I didn't get a close up of the light blue mitten I made for the baby.  I used a giraffe button I had in my stash.  It looked so cute!


Here is a closer look.  I used some of SU's Christmas ribbon for the hanger.  I used the mitten, cuff and snowflake dies before I sewed them together.  I was only going to make a few but once I got started I couldn't stop!!  


I'm not an expert seamstress but following the video they came together pretty good!  This is what I have been doing instead of making Christmas cards!  

I hope everyone had a wonderful Thanksgiving.  We are getting our first snow flurries for the season.  Jennifer and her friends enjoyed the Christmas lights this past weekend, as well as the ice skating rink that was set up.  They made it of acrylic.  Not as good as ice but they had fun!  


Thanks for stopping by,


Nancy


Saturday, December 12, 2020

Christmas Oraments

 Well, we had a busy day!  My daughter and Jennifer came up this afternoon for a visit.  Jennifer is always looking for something to do and today was no exception!  She wanted to make some Christmas ornaments for friends, cousins, etc.  Fortunately, the other day I was looking for something and came across SU's Be Merry Kit that I had purchased the other year.  Not sure why we didn't make it then but it came in handy today!  It turned out to be a really nice kit.  Of course it had all the pieces needed but it was easy to put together.  Jennifer put together the rosettes and decided the designs, and I used the glue gun.  She used some of the plain white circles to sign and date them and I glued them on the back.  Mom cut 6 inches off of her hair.  I think it made her look more grown up.  No little girl anymore!


Here is a close up of the ornaments.


Now I have to get back to finishing up the kids Christmas cards.  It was really warm and foggy here today but they are forecasting snow for the middle of the week - Oh Goody!!

Our Governor shut down the state again, so Rachel lost her job and Sarah will probably be next.  It is hard to understand why they let some places open and others they shut down.  I hope next year will be better.  All schools are back to remote until at least the first of the year and I'm sure it will be longer than that.  My daughter was told this week that she will still be working home remotely until at least the Spring.  Jennifer had her picture taken this week with both her and Santa wearing their masks - something documented for her to look back on in the years ahead.

Thanks for stopping by,

Nancy

Tuesday, November 24, 2020

Chocolate Pumpkin Orange

 The days are sneaking up on me and I'm not finished with some cute goodies I am making for the family, so I thought I had better post a picture sooner than later!  I saw these adorable pumpkins over at - Mixed Up Craft - and knew right away I wanted to make some.  I originally only ordered one from Amazon as they are not cheap, but eventually I found some locally that were on sale.  They came together so quick and easy!


They are from Terry's Chocolates and  come in a box.  When you open them the chocolate is in slices like an orange.  The stand is quick to put together.  I used some left over leaves I had in my stash from Heartfelt Creations.


I also had some extra Sunflowers left over from a project as well that I used for my blossoms.  Her video is very detailed. I really like so many of her projects!  I used some Nuvo drops for the centers of my flowers.  I have a few more to go!  She also mentioned that they could be made for Christmas using poinsettia flowers.  I think that would be really pretty!  I hope everyone has a blessed Thanksgiving!

 Thanks for stopping by,

Nancy

Sunday, October 18, 2020

Halloween Treats

 Welcome back to my blog!  I hope you are having a good weekend.  Here in PA the weather has been great!  We had frost last night but the daytime is nice and warm still.  My friend sent me a package in the mail last week and it sure came in handy.  It was SU's Paper Pumpkin for October.  It was full of Halloween treat goodies.  Jennifer had asked me if I would make her some treats for the goodie bags for her birthday party.  I used to get the Paper Pumpkin years ago - I think they have come a long way!  It didn't take too long to put these goodies together.

I just had to punch out the treats, glue them together and then decorate them.  They had a lot of decorations including the stamps, dimensionals and even the twine.


Here is a close up of the individual treats.


Here is a picture of Jennifer and I making our Pumpkin Streusel Muffins.


They turned out so good!  Joe is ready for me to make some more!  If you are interested here is the recipe that I got from The Farmstand:

Mix -
1 stick of melted butter
1/2 cup of sugar
1/2 cup brown sugar

Add -
2 eggs
2 tbsp. vanilla
1 1/2 cups flour
1 tsp. Baking Soda
1/2 tsp. salt
2 tsp Pumpkin Pie Mix

Then add -
1/2 cup sour cream
1 cup pure pumpkin

Fill muffin pan (makes 18) 3/4 full and top with the Streusel Mix
3/4 cup flour
1 tsp cinnamon 
1/4 cup sugar
1/2 stick melted butter
1/4 cup chopped pecans

Bake at 425 degrees for 5 minutes and then lower the temperature to 375 degrees for 15 minutes.

If you want to glaze them:
1 cup powder sugar
2 tbsp. milk
1 tsp vanilla or maple syrup
 
You can tell baking season is upon us.  All Jennifer wants to do it cook and Joe wants to eat!!  Have a great week!

Thanks for stopping by,

Nancy


Tuesday, May 7, 2019

Hershey Flowers for Mother's Day

It was time for me to make some goodies for my daughter to take to the Wellness Center for Mother's Day.  Brenda Quintana had another adorable tutorial to make these cute Hershey Flowers.  I love all her Hershey tutorials and this one fit the bill.  I have been working on them off and on for awhile as it did involve a lot of cutting and gluing but I think it was worth it.


Here is a picture of the stems I was making.


Since I was making a lot of them, I cut up my material for 5 at a time.  These were great for using up scraps of materials.  I really cleaned out my scraps.


I didn't have the punch she used for the centers, so I used a smaller version I had on hand.  I also got to use up some of my old gem stones that I had been rattling around in the drawer.


Here is a closer look at the finished product.  Who doesn't love some Hershey kisses? 


Here is a picture of one of the trays ready to go.  I still have about 10 more flowers to make.  I love how these turned out.  You could make them for multiple occasions.  I'm going to give some of them to my girls for Mother's Day. 

Thanks for stopping by,

Nancy


Tuesday, April 16, 2019

Hershey's Nugget Bunnies

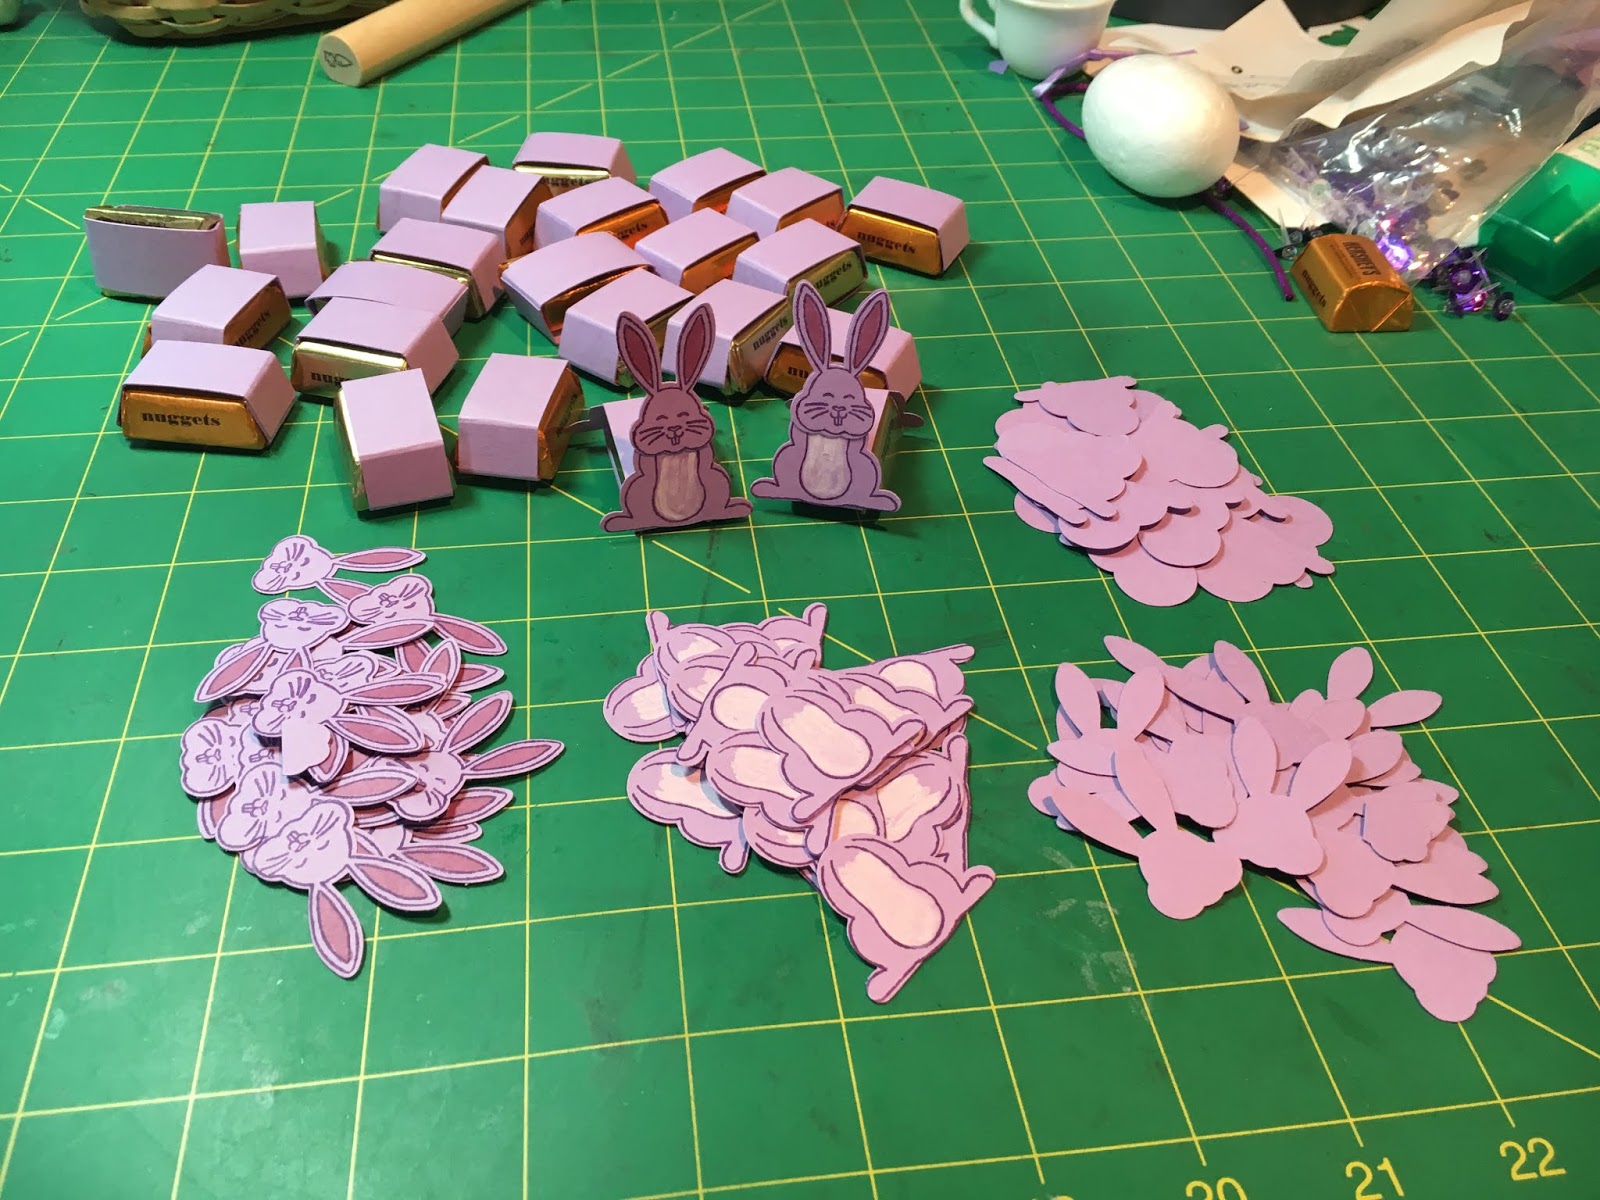
I finally finished my last tray of these adorable bunnies that I made for my daughter to take to the Wellness Center.  I had a lot of ideas going through my head as to what I would make for the Center, but when I saw these cute little bunnies they won hands down!!  I love Brenda's -  VIDEOS - and this was no exception.  Good thing I had order this punch and stamp set as it became unavailable for a while but is now online again.  I just fell in love with this bunny and am so glad I have him in my collection.  I don't usually get a lot of punches, but I'm sure I will get a lot of use out of it.  Because of the amount I had to make, it did take me awhile but I'm sure the folks will enjoy them as much as I did making them. 


Using the method I posted before about lining up your stamps for the punch, it make the job easier and Brenda gave instructions for mass production as well which is always appreciated.  To make my life easier, I just went with one color - Highland Heather CS and used Gorgeous Grape for my ink.  If I have time I'm going to make a few in different colors for the girls. 


I put together the bottoms first and then got all the other pieces ready before I glued them.


I didn't have a white chalk marker, so I used my white craft ink for their little tummy's and colored in their ears with markers before I glued them to the bottom.


Here is one of the trays with them already to travel to their new homes!  I made about 60 of them so the punch definitely had a work out.


Here is a close up of the bottom with a little white tail and their cute little face.  Good thing I had extra candy to help me along the way!

It seems like I never start earlier enough.  I have a few more goodies to make, so we will see if I make it under the wire.  I hope everyone is having a good week in anticipation to leading up to Easter.

Thanks for stopping by,

Nancy


Friday, December 1, 2017

December Planner

It seems like yesterday that I posted my November planner and here it is time for December's.  I so enjoy doing this every month.  It is so neat looking at the calendar all decorated.  I didn't have a lot of time this month, but I was happy how it turned out.


I used the following stamp sets for this month - Tags and Trimmings, Seasonal Chums and Labels to Love.  My DSP was Candy Cane Lane and I used my tree punch as well.  I also used some washi tape around the HO-HO-HO that I had picked up from Michael's.  It's hard to tell, but I stamped some stars on the paper as well.  Our decorations are up, and we finished the tree yesterday.  I'm waiting for the girls to come by this weekend to put the manager set up.  I started this when Rachel was only 2 years old and it has become a tradition.  Hope everyone has a great weekend.

Thanks for stopping by,

Nancy


Saturday, November 4, 2017

November Planner

I'm about 4 days late posting my November Planner - but better late than never!!  I love decorating these calendars.  I used Painted Autumn DSP and cut out some pumpkins from the same DSP.  I love all the sentiments from the Painted Harvest stamp set and used one of this at the top of my page.  My Happy Thanksgiving stamp I have had for years that I got at good old Michael's $1 bin. 


Do you like that great washi tape?  It's the Year of Cheer Specialty tape.  I love washi tape and am using it more and more.  The cute acorns are stamped from the Count My Blessings stamp set and my funny turkey I have had forever.  I just love his cute face looking down at the sign - EAT HAM!!

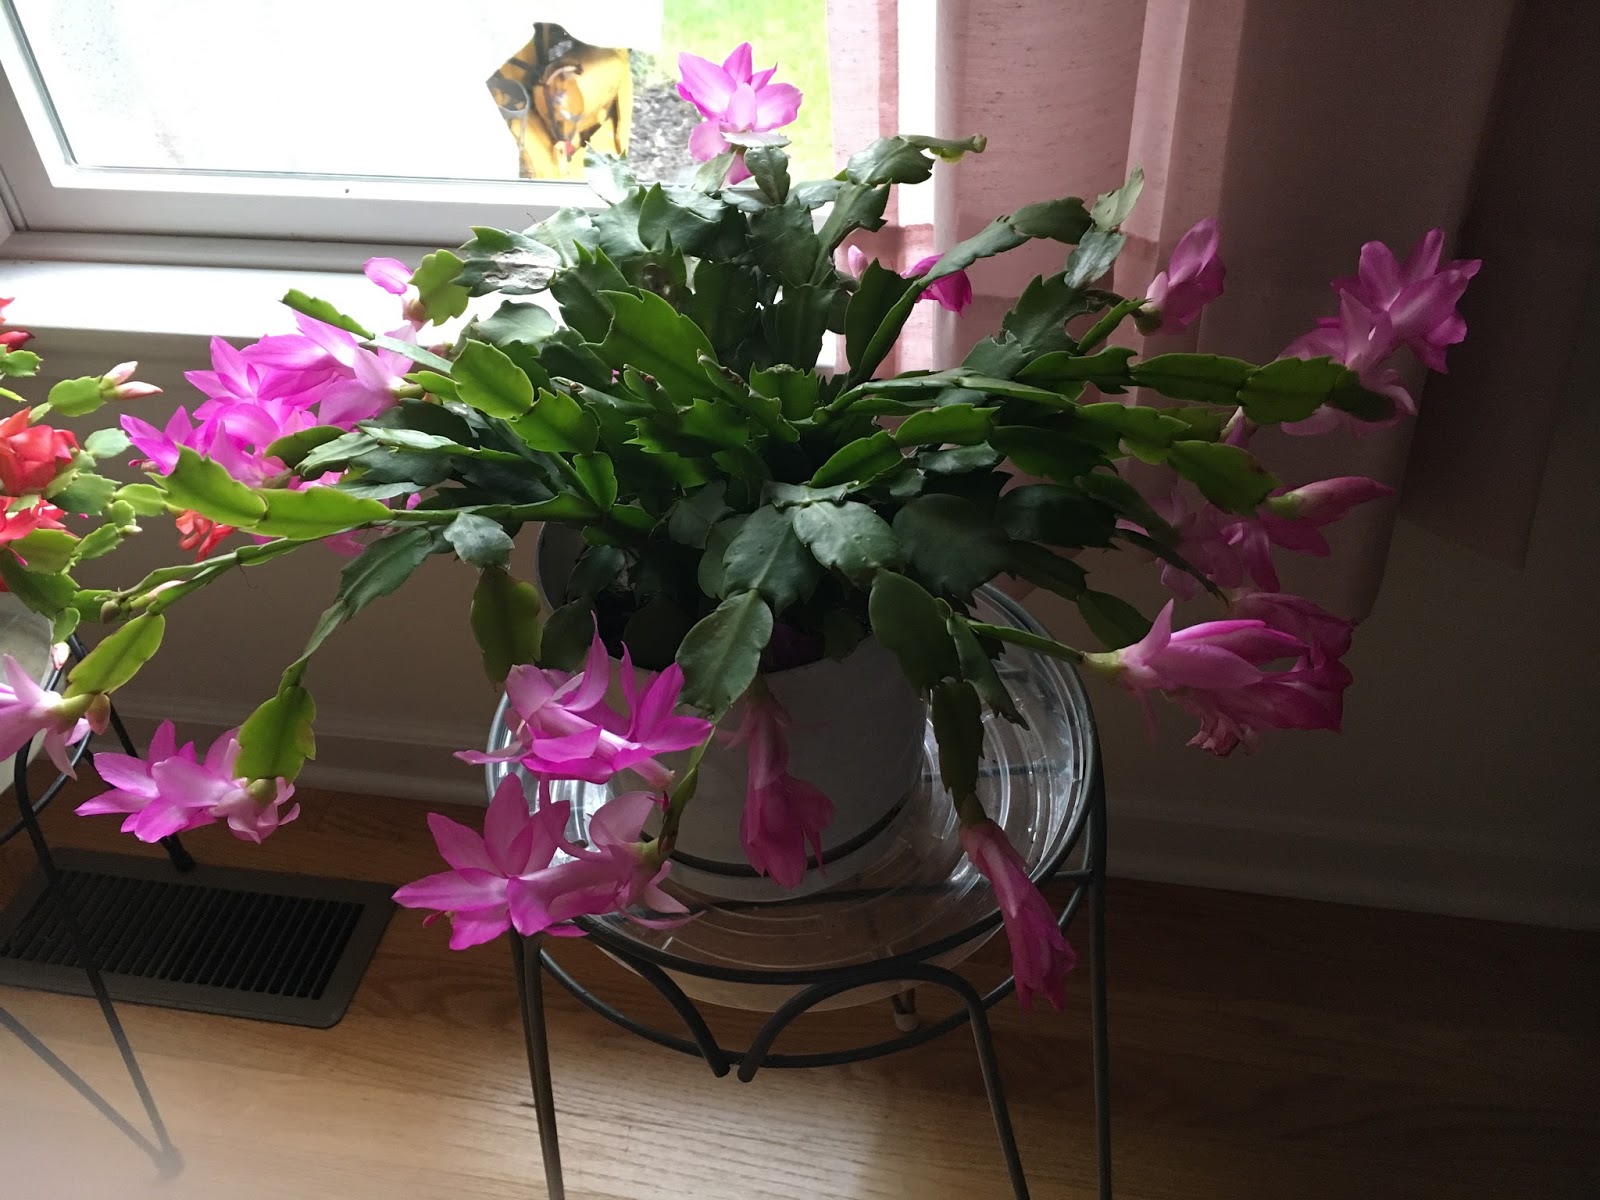
It's been getting pretty chilly here, so we have been bringing in all our plants.  I have two Christmas Cactus plants and they say you are suppose to put them outside to rest and then bring them back inside when it is fall so they will bloom for Christmas.  Well, someone forgot to tell them that. 


They are both loaded with so many blooms!  I don't think they will last until Christmas, so I am enjoying them now!

Thanks for stopping by,

Nancy

Thursday, October 26, 2017

Halloween Goodies

Hope everyone is having a good week!  Fall is definitely in the air around here.  I guess I'm going to have to get out some jackets to wear!  Today's post is one of the trays I made up for my daughter to take to the nurses at the hospital in her unit.  I have been making these cute ghost lollipops for years and the kids always ask for them again and again  They are just lollipops wrapped in a coffee filter which has been stamped with a face and then a little bow tied around them.


The cats are made from the Spooky Cat stamp set.  These little guys are filled with a Hershey kiss.  They are all over the blogs.  The holder is made with a piece of paper 4" x 1" and scored at 1", 2", and 3" and folded into a triangle and glued in place.  I stamped a piece of paper with the cat stamp and punched it out with the cat punch.  Then punch out another plain cat for the back.  I glued in the front piece first to the triangle and then the back.  The best part is to place a Hershey kiss in the triangle.


Of course, you must taste a few to make sure the candy is fresh!!


Come back later this week to see the birthday card that I'm making Jennifer. 

Thanks for stopping by,

Nancy

Tuesday, August 29, 2017

A Little Wild Bookmarks

The other week while Jennifer was visiting, she wanted me to make her another bookmark.  I had made her this cute little -  Caterpillar  - before.  We got out SU's set called A Little Wild and got to work.  They turned out so cute.  I ended up making some for her to take to her friends at school as well.


I used jumbo paperclips to adhere them on.  For the elephant I ended up using some 1/8" ribbon and tying some twine around it.


I even painted their little toes pink!


Next we made the lions.


Jennifer found some gold dots I had laying around and decorated them.  I also colored in their mane.


The last one we made was the bear.


She has a fascination with bears, as she sees them several times a week in her yard.  She decided to put a little bee on each one.


We had such a good time playing around.  I really like these dies!  It is really raining and cold here but nothing like in Texas.  Our thought and prayers go out to all that are affected by this terrible storm.

Thanks for stopping by,

Nancy