Thursday, December 29, 2016

Cookie Cutter Christmas Reindeer Note Card

While I'm watching the snow fall down, I thought I would post this cute note card I made.  I gave away several gift cards and decided I wanted to make something other than the usual gift card holders.  I saw these adorable note cards on one of my favorite blogs - Brenda Quintana.  Her video is just great as always!


I thought this note card was so cute!  Putting the little bell on the twine just topped it off for me.  I think I' going to make some for Thank You cards as well.  It is just the perfect size.  Hope everyone had a wonderful Christmas.  Hard to believe that it is behind us already.  I say this every year - I'm going to have to start earlier next year making cards, etc. I'm off to make some more cookies!

Thanks for stopping by,
Nancy

Saturday, December 24, 2016

Hot Chocolate Holder

I decided I wanted to make something else for the Wellness Center.  Every year, I usually make some hot chocolate holders.  I saw this VIDEO from Chic N'Scratch and decided to make some.

  
They came together pretty quick!  I never had the hot chocolate from Sam's Club.  Angie was right - they are pretty good!  I can't believe that I used up most of my Xmas paper this year.  That never happens!  I think this year's paper was especially nice though.


The sentiment I used is from SU that I put together on a block.  Well, they went over big!  I got two empty baskets back today!


Everyone in the Pansy Patch would like to wish and yours a very Merry Christmas!!

Thanks for stopping by,
Nancy


Friday, December 23, 2016

Decorated Candy Canes

I just realized that I didn't post the goodies that I made for my daughter to take to the hospital and Wellness Center.  Boy, things are moving ahead pretty darn quick!  I didn't have a lot of time left to make something for them, so I put together these cute candy canes!


I used my Cookie Cutter Christmas stamp set and punched out the reindeer in Crumb Cake CS, Santa Claus and the Gingerbread Man in Whisper White.  I only had to color in the nose for the reindeer, and for the gingerbread man I used my Early Espresso ink which made it quick and easy.  Santa was the only one I ended up having to color.


I tied different color ribbons on each stamp and then used my mini glue dots to place the punch out on the candy cane.  Considering I made about 50 it went pretty fast.  Here is a close up of each type finished.


I found a cute little basket and propped them up all ready to travel.


The girls only had a half day today and now they are off until after New Year's.  It is so warm here today, I cannot believe the weather change - but you won't hear any complaints from me!

I entered these candy canes in Cardz TV Anything Goes Challenge #7.

Thanks for stopping by,
Nancy

Saturday, December 17, 2016

Magic Reindeer Food

Well, it is a snowy, rainy and cold day!  We got a few inches of snow overnight, but the weather is suppose to warm up and melt everything - yeah!!  Jennifer wanted me to make her friends some Reindeer Food packets so she could hand them out yesterday at her Christmas Concert!  It was so cute!  She is the smallest one in the group!  They were singing "We Wish you a Merry Xmas" as I knew because she had been practicing it was weeks!  The kids did such a good job and loved the Reindeer Food!


Jennifer helped mixed all the goodies together - oatmeal, raisins, sprinkles - anything edible.  Then I proceeded to make the little boxes to hold the packets.  Every year I make a different variety and this year it was from Chic N' Scratch.  Here is her VIDEO.   Last year I made this one - Magic Reindeer Food.


Here are the packets all finished.  I loved using the Cookie Cutter Christmas.  Since I didn't want the kids to open them before Xmas Eve, I decided to wrap them up again to make it easier for them to take home,


I just put them in a cello bag, tied them up with some ribbon and printed out a sentiment - Merry Christmas - Love Jennifer.


I found an old red basket, decorated it up with some ribbon and doilies and put all the Reindeer Food inside,  Jennifer loved taking it to school.   Well, I hope everyone is having a good weekend and that you are warm and cozy!!

Thanks for stopping by,
Nancy


Friday, December 9, 2016

Christmas Mice Cards & Holder

Christmas is in the air!!  OMG!!  I can't believe the big day is almost here.  As usual, I never have enough time or energy for everything!  We have been so busy around here.  My daughter, Jennifer, Joe and I went to Lancaster, PA. for a few days and had a wonderful time.  It was the first time Jennifer saw Santa and she was so excited.  They had Santa come to the local library - on a firetruck! The kids loved it!  Inside they had hot dogs and goodies for everyone, tables to make ornaments, and they even gave each child a beautiful book.  We had such a great time.  Here is Jennifer with Santa.


Let me tell you he looked pretty real to us!  His beard and mustache were real and he was so good and patient with the kids.  It was freezing but no one seemed to mind!

I was going to post this card holder before I left, but never got around to it!  I saw this great VIDEO on one of my favorite blogs and decide to make some.   They turned out so cute!


 I made some in different colors, but these are the only ones I have left to show you.  Here is the VIDEO for making the cards.  One card is in the front of the holder and these are the other two cards.


I also decided to stamp the envelopes.  Here is an example of one of them.


I fell in love with these cute mice and so loved how these cards turned out.  I hope everyone is staying warm and cozy.  It is getting pretty cold here and snow is in the forecast.

I entered this in CardzTV Anthing goes Challenge #6.

Thanks for stopping by,
Nancy, Rachel & Sarah

Wednesday, November 23, 2016

Thanksgiving Turkey Card

The other Thanksgiving card I made this year is an adorable turkey!  I saw this cute die at Frantic Stampers and had to have him! I love how he turned out.


I made my base card in SU's More Mustard and the my layer was in Crumb Cake mounted on Very Vanilla, which I ran through my embossing folder - Basket Weave.  I used Chocolate Chip for his body and scraps of DSP for his feathers.  Each piece is a separate die cut and they all fit together to make this cute little turkey - too cute to eat for dinner!!


I used y oval punches for my greeting, which is a Cardztv Stamp.  I felt it needed something else on the front, so I tied some twine under the sentiment.


My inside sentiment is from SU and I hand wrote You!  underneath it when I sent them out!  I really enjoyed making this cute little bird.  Jennifer thought it was cute as well, as I gave it to her for Thanksgiving.  I'm sure everyone is busy getting ready for the big day tomorrow.  Jennifer called me this morning to tell me she and her Mom are making cupcakes for tomorrow - her favorite thing to do and the girls, Joe and I are going shopping for Xmas gifts this afternoon when they get out of school.  We must be nuts!

Everyone in the Pansy Patch wishes you and your family a wonderful Happy Thanksgiving!!

   Nancy            Rachel            Sarah

Saturday, November 19, 2016

Thoughtful Branches Thanksgiving Card

I didn't have a lot of time to make very many Thanksgiving cards this year, but fortunately, when my friend Martha was here this summer we were playing around with her SU stamp set Thoughtful Branches she had just purchased.  I did most of the stamping and put them away and just remembered them,


It was kinda of fun how we made these.  We stamped the leaves in Pumpkin Pie ink on our Whisper White layer.  Then we used the die and cut out the tree leaves in Pumpkin Pie and placed it over the stamped image.  We did this upside down so it would look like a pumpkin instead of a tree.  Any little white spots that showed through we used our marker to color them in.


For the inside sentiment I had an old SU stamp I used.


We used the tree trunk for the stem of the pumpkin and die cut a few leaves to place on it using Old Olive.  Since I didn't have any Old Olive ribbon, I used my sponge daubers to color my ribbon.  I think they turned out pretty good.  Just another way to use that stamp set.

Well, Thanksgiving is almost here and NO, I'm not ready!  Lots to do the next few days!  Hope everyone is having a great weekend.  We are enjoying some beautiful weather, but that's about to change tomorrow.

Thanks for stopping by,
Nancy, Rachel & Sarah

I entered this card in Cardz TV Anything Goes Challenge #4.

Saturday, November 12, 2016

Birthday Card

Well, today is moving day for my daughter, Rachel and Sarah.  Lots of mixed emotions on this day.  I will miss their comings and goings, but it will be nice to have the place to ourselves again plus my stamp room back!!  The movers just left for their new house, so I decided to post this cute birthday card I made for a special friend.  She loves anything to do with ice cream, so I thought this card would be perfect.


Recipe:

Stamps - Honeycomb Happiness, Gorgeous Grunge
Ink - Watermelon Wonder, Crumb Cake, Basic Black
Paper - Crumb Cake, Watermelon Wonder, Whisper White
Accessories - SU Aqua Painter
Embellishments - Enamel Shapes

After I cut my layers, I used my Gorgeous Grunge splatter stamp on the Whisper White CS using both of my colors, stamping off once.  Then I stamped my ice cream cone out and colored it in using my aqua painter.  I cut it out and placed in on the center of my card using a thick dimensional so it would stand out.  I stamped my sentiment near the bottom and placed my little hearts.  I love these shapes.


Then I adhered it to my layers and stamped my sentiment on the inside.  I really liked how it turned out.  Hope everyone is having a great weekend!

Thanks for stopping by,
Nancy, Rachel & Sarah


Sunday, November 6, 2016

Jennifer's Recordable Birthday Card

I am in the midst of playing catch-up!  These days are flying bye.  It has been a busy week with Jennifer's birthday and then with everyone here celebrating Halloween.  My daughter has also started moving things into their new home so chaos is everywhere!  Poor little Joey - their Chihuahua - is so confused he is following me around everywhere!  I wanted to show you the birthday card that I made Jennifer.  I was so pleased how it turned out!  I had made her a recordable card for her 1st birthday and she loves to play it, so I decided to make her another one.  I took me awhile to find one which was buried in craft stuff but after a good hour I finally found it.


I had purchased a few of these from SU.  I don't think they sell then anymore.  I layered a piece of DSP on the front flap and then a layer of Daffodil Delight.  I used SU's Honeycomb Happiness stamp set and the # of Years set.  I stamped the little bird twice - once on the layer and then one on the Perfectly Artistically DSP (the beige side) and shaded his little tummy.  I stamped my balloon on the layer and then fussy cut the bird out and adhered is over the stamped bird on the layer.  It basically created a mask.  I stamped the balloon again on the same DSP, cut that out and placed it over the stamped balloon.  For the birthday hat, I used the Hello stamp set and cut it out as well.  I die cut the number 3 from the same DSP, as well as with some thin cardboard to give it some depth.


Here is the inside of the card.  After we recorded our sentiment, I made a template using my circle punches, so only the play and sound would not be covered.  This way she won't be able to press the wrong button and erase over the recording.


For the other side of the card, I just layer a piece of the same DSP that I had used on the front.  She loved it!

When we got to her house for her party last Saturday this is what greeted us!


My daughter and her husband surprised her with a bounce house.  Boy did the kids love this.  They even had a slide inside that one could go down on and she actually did!  Even my husband went in - but not for long!  Oh, to be young again!


Here is a picture of her birthday cake - Princess Sophia - that is her favorite right now!


Before the festivities started my daughter got a picture of the birthday girl.  They always have the number of pumpkins that is her age.  We'll see how long this lasts.


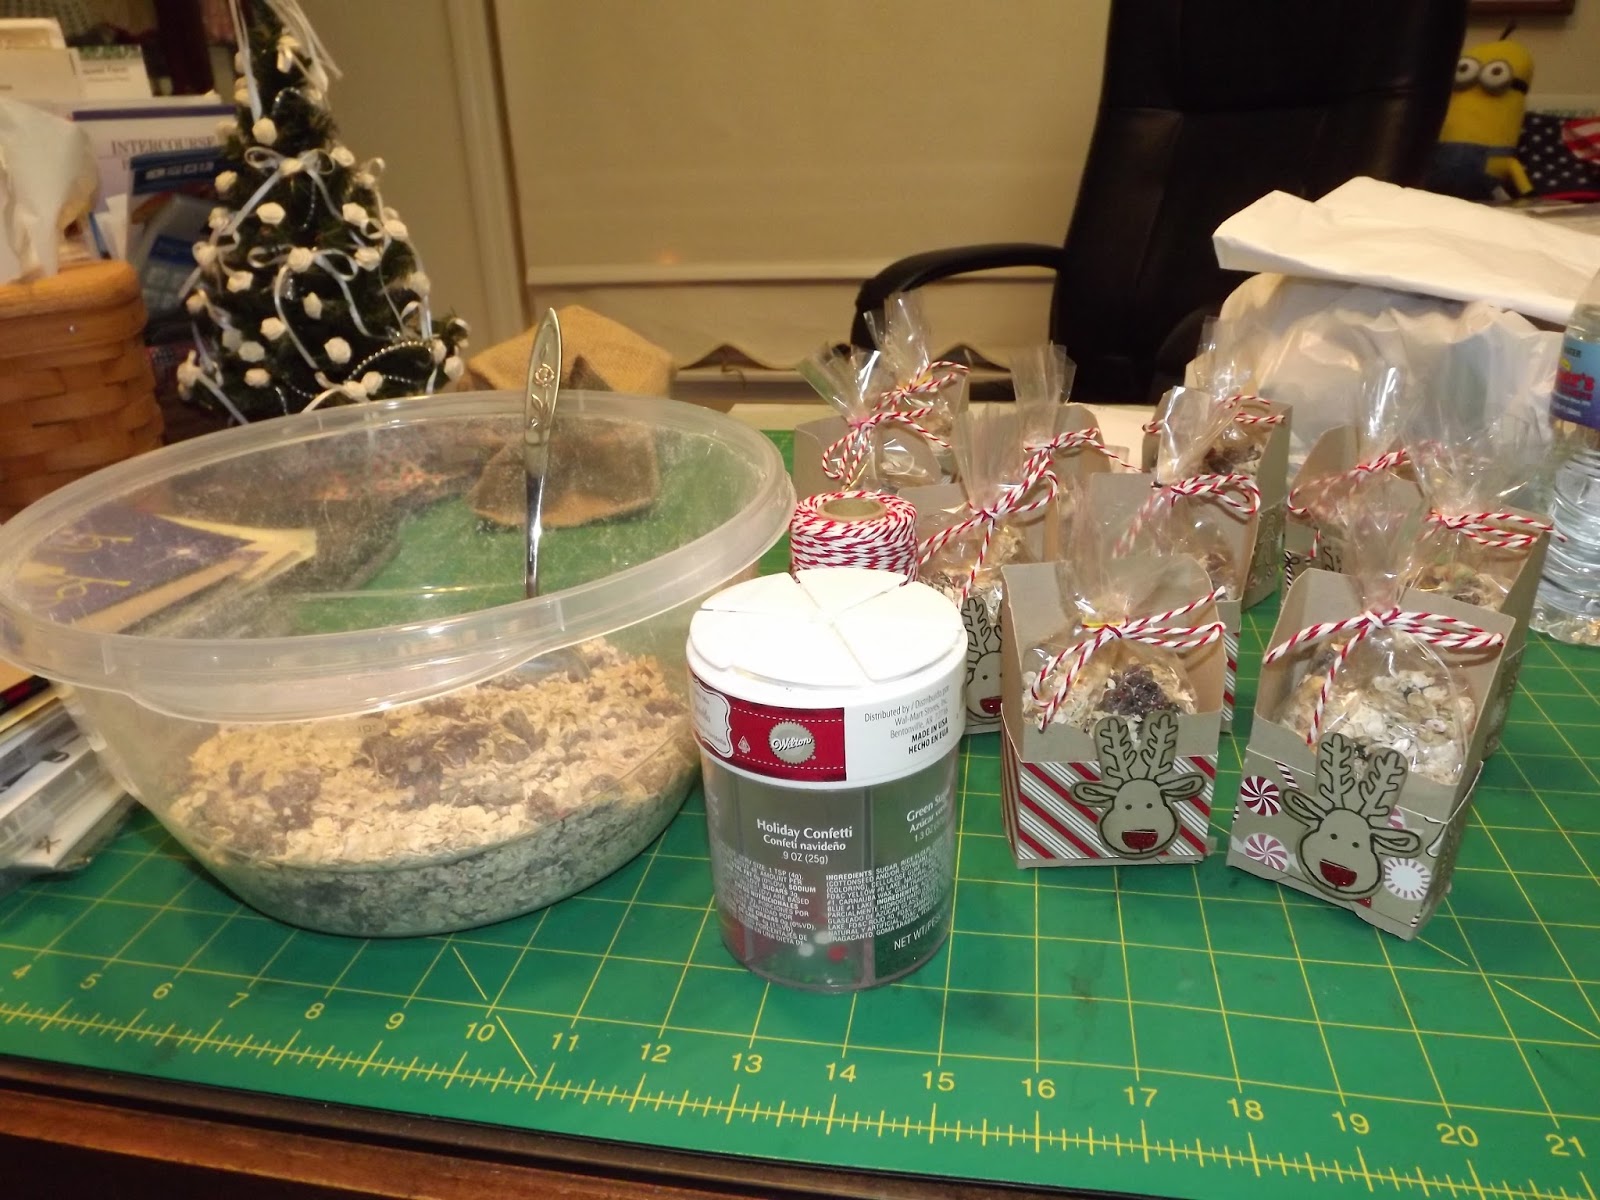
This picture is her on Halloween in her giraffe costume!  They had a cute parade in daycare and these are the goodie bags I made for her to give the kids!


The girls had a ball with her this year,  She was definitely into going "trick or treating".  Today is our 51st Wedding Anniversary!  We decided to sneak out and go to our favorite restaurant for dinner. It was delicious!  I don't think I will eat for at least 48 hours!  Hope everyone has a great week!

Thanks for stopping by,
Nancy, Rachel & Sarah

Saturday, October 29, 2016

Spooky Fun Flying Witch Spinner Card

I hope everyone is having a great weekend!  I almost forgot to post Jennifer's Halloween card.  I saw this card at Stamp & Scrap with Frenchie  and knew Jenifer would love it.  She loves the spinner cards.  I made the Shooting Star Spinner card for her in August.


It came together pretty easy.  Frenchie has all the measurements and instructions in a print out for you if you decide to make it.  I did have to adjust the black CS measurements for the bottom.  Well, we're off to Jennifer's for a fun packed day.  Her Dad has put up the bounce house and she is already in it having a ball and the party doesn't start until 4pm.

Splitcoast Stampers just notified me  -Congratulations! In the General Stamping forum, you're in the FAVORITES for the week ending October 30.  Thanks so much! 

Thanks for stopping by,
Nancy, Rachel & Sarah

Wednesday, October 26, 2016

Witch Halloween Card

Here is another Halloween card that I made.  This card can be made in so many coordinating colors.  I used SU's spider web in the background again.  I think they add so much to the card.  Just let your imagination go wild!


Recipe:

Stamp Set - Haunt You Later
Ink - Basic Black, SU Markers of your choice
Paper - Black, Pumpkin Pie, Very Vanilla, DSP
Embellishments - SU Spider Web

I really had fun making this card.  I had purchased this set and had not really used it much and wanted to color that cute witch on paper.  I decorated the Very Vanilla layer with dots using my SU Markers and I loved how it finished off the layer.


I also decided to do the same with the inside panel with my sentiment.


Well, this week has been pretty busy so far.  Everyone is busy cleaning and moving into their new house and also getting ready to celebrate Jennifer's birthday on Sat.  I hope the expected snow stays further north.  Everyone will be coming here for Halloween as usual, so we don't need any of the "white" stuff!!

Thanks for stopping by,
Nancy, Rachel & Sarah

Saturday, October 22, 2016

Clear Tiny Halloween Treat Boxes

I had a few minutes and thought I would quick post this cute treat box.  Everyone was here for the day, so I let Jennifer help me with these adorable boxes.  I had purchased them from SU, as I love little things like these.


I needed some more goodies for Halloween and thought these boxes would look cute made up with some candy corn to look like a pumpkin.  After I put them together, Jennifer filled them up with the candy corn.  Of course, we had to sample the corn to make sure they were yummy!


After sealing them shut, I cut a thin piece of Old Olive paper in a strip and twirled it around a paint brush handle to make it curl so it would look like the pumpkin stem.  I then tied a Halloween sentiment and small pumpkin face with some black and white twine.  I thought they turned out so cute, and they were so easy to make.

The other day Joe and I took a ride up in the mountains to check out the leaves.  They are really starting to look so pretty with all the different colors.  When we got home I took a picture of my yellow mums in the front yard.  They turned out so nice this year.


I have purple ones, but none turned out so nice as these did.  I hope everyone is having a nice weekend.  It rained here today, so I'm glad I took this picture before it got so miserable outside.  They may not survive with the wind tomorrow.

Thanks for stopping by,
Nancy, Rachel & Sarah

Thursday, October 20, 2016

Spooky Halloween Card

Here is another Halloween card that I made.  I love the black spider webs that SU put out last year.  I think they go so well with the Woodland Embossing Folder.


This card came together really quick, which is what I needed.  I saw this on Pinterest and decided to give it a try.


Here is the inside of the card.  I used my favorite Michael's stamp again!


Recipe:

Ink - Basic Black
Paper - Whisper White, Black, Pumpkin Pie
Stamps - Among the Branches
Accessories - Woodland Embossing Folder
Embellishments - Spider Doily, Ribbon, Twine

I decided to make some of my favorite treats last night - Tootsie Pop Ghosts using coffee filters.  I make them every year for my daughters to take to work and have some to give away.  This year Jennifer is having her first real birthday party with some friends on Sat., so I made a bunch to put out on the table as well.


Hope everyone is having a great week .  Our weather has been so beautiful here but the rains are coming in fast today.  It could stay like this all year long for me!  I would be a happy camper!

Thanks for stopping by,
Nancy, Rachel & Sarah


Sunday, October 16, 2016

Cookie Cutter Slider Halloween Treat

I have such an adorable treat for you to make for Halloween.  I saw this on Brenda Quintana's blog and fell in love with it!  I had ordered the Cookie Cutter Halloween and Christmas stamp sets along with the punch,  and knew these sliders would be so cute for the folks at the Wellness Center.  Here is a picture of all of them in a basket ready to go.


I made about 40 of them and I was surprised that it didn't take as long as I thought it would.  Check out her video as she does such a great job explaining how to make them.


Here is a closeup of the three designs that I made.  I loved how they turned out.  We have been so busy watching Jennifer a few days this week that I didn't have any time to post.  Later on this week, I'll post some more Halloween cards I made,  My daughter is closing on a house tomorrow, so there is a lot of excitement going on - maybe I'll get my craft room back soon!  It definitely will be quiet here again without the girls and Joey - their Chihuahua!

I submitted this Slider Treat to  Cardz TV Anthing Goes Designer Challenger #2.  Check out all tghe goodies!

Thanks for stopping by,
Nancy, Rachel & Sarah


Friday, October 7, 2016

Halloween Paper Pumpkin Bags

Well, all I see all over the blogs are goodies for Halloween - and yes, all the Christmas stuff is out as well.  Today, I wanted to show you these cute Halloween Bags.  When my friend was up from Florida, she gave me a bunch of Paper Pumpkin Boxes that she didn't want.  She knows that I always make up some goodies for the Wellness Center for my daughter to take and thought I would like these adorable bags.


I'm not sure which year they were produced, but you can get these little bags in the craft stores and reproduce as many as you need.  Actually, you could buy the burlap and make or own bags, if you had a lot that you wanted to make.  They came together so quick and easy!


I stuffed some goodies inside the bag and wrapped some twine around the bag a few times and tied a bow.  Then I stamped the labels that were in the kit and backed them with some cute DSP.  They even supplied some sequin rope and clothespins to secure to the bag.  It took hardly any time at all to put them together.  I have a bunch of projects I'm working on for the Wellness Center and these will be a great addition.

We hope all that are in the hurricane's path will be safe and sound.  I'm sure the East Coast will get it share of the rain next week.  It has been such a beautiful week, it is hard to believe what is happening down south.  Have a great weekend!

Thanks for stopping by,
Nancy, Rachel & Sarah

Thursday, September 29, 2016

BOO Halloween Card

This is the last card my friend and I made before she left to go home to Florida.  We thought it was so cute.  I had seen it on Pinterest and wanted to try it.


Recipe:

Ink - Basic Black, Pumpkin Pie
Stamps - Howl-0-ween Treat
Paper - Smokey Grey, Pumpkin Pie, Whisper White Thick, Daffodil Yellow, Shimmery Black, Gold
Accessories - Framelits  BOO to You, Woodland Embossing Folder
Embellishment - Rhinestones

I used my Pumpkin Pie CS for my base card.  I ran my Smokey Slate CS through the embossing folder and sliced an opening big enough for my cute little owl to slip behind the tree.


I stamped my images in Pumpkin Pie on my Whisper White CS and used my framelits to cut them out.  I sponged the moon in Pumpkin Pie just to give it some texture and cut it to fit the corner of the card and scattered a few stars around.  We loved how it tuned out.


The sentiment is stamped in Basic Black.  I love this sentiment as it is big!  Well, October is almost here - time to start decorating for Halloween!  We always loved that holiday, and now that it is Jennifer's birthday it is even better.  Jennifer graduated to the next class - Pre -School and is having so much fun!  It is hard to believe that she is going to be 3 years old!

My air-conditioner has been replaced with the heat as it has turned rainy and cold.  I hope my mums withstand the cold as they turned out so beautiful this year.  I'll have to take some pictures.

Thanks for stopping by,
Nancy, Rachel & Sarah