I decided I had better make some Thanksgiving cards before its too late. I have seen so many of these adorable cards in Pinterest and decided to make one for Thanksgiving and one for Christmas. I used the Painted Harvest leaf punch for both cards. You could use any colors that you desire.
I used the sentiment greeting from the Painted Harvest for the Thanksgiving one and the other was a Christmas Greeting. I punched a bunch of leaves out of different colors and then started placing them in a circle starting at the 12, 3, 6 and 9 positions and then filling them in. I loved using the foil and the glimmer paper in the Christmas one. I thought they turned out pretty nice!
The weather here has been so cold, windy and miserable. It is suppose to warm up a bit tomorrow. The girls were off from school today due to Veterans Day but no one ventured outside much. We are heading over to NJ tomorrow early to visit with Jennifer. Their little church by them is having a breakfast and we love going to it. Hope everyone is keeping warm and have a good weekend!
Thanks for stopping by,
Nancy
Pansies always stand for thoughts - so this comes to show my thoughts are there with you today!
Friday, November 10, 2017
Saturday, November 4, 2017
November Planner
I'm about 4 days late posting my November Planner - but better late than never!! I love decorating these calendars. I used Painted Autumn DSP and cut out some pumpkins from the same DSP. I love all the sentiments from the Painted Harvest stamp set and used one of this at the top of my page. My Happy Thanksgiving stamp I have had for years that I got at good old Michael's $1 bin.
Do you like that great washi tape? It's the Year of Cheer Specialty tape. I love washi tape and am using it more and more. The cute acorns are stamped from the Count My Blessings stamp set and my funny turkey I have had forever. I just love his cute face looking down at the sign - EAT HAM!!
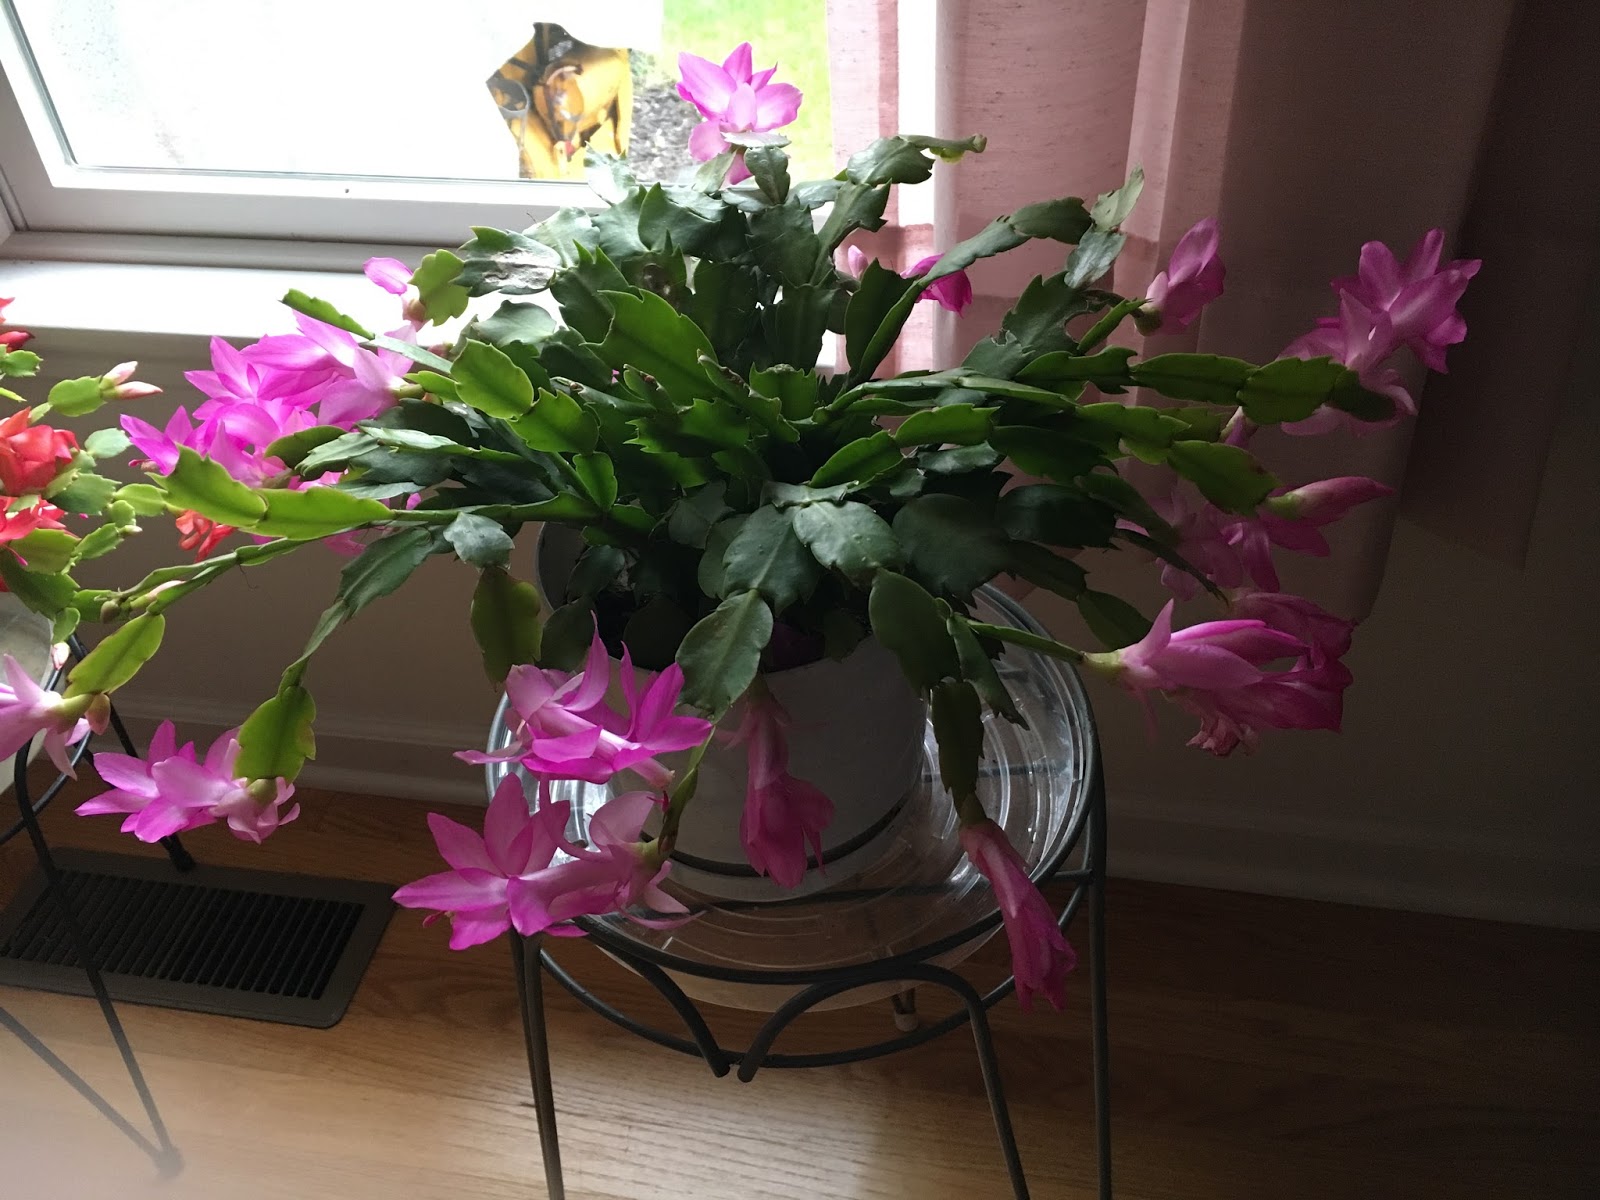
It's been getting pretty chilly here, so we have been bringing in all our plants. I have two Christmas Cactus plants and they say you are suppose to put them outside to rest and then bring them back inside when it is fall so they will bloom for Christmas. Well, someone forgot to tell them that.
They are both loaded with so many blooms! I don't think they will last until Christmas, so I am enjoying them now!
Thanks for stopping by,
Nancy
Do you like that great washi tape? It's the Year of Cheer Specialty tape. I love washi tape and am using it more and more. The cute acorns are stamped from the Count My Blessings stamp set and my funny turkey I have had forever. I just love his cute face looking down at the sign - EAT HAM!!
It's been getting pretty chilly here, so we have been bringing in all our plants. I have two Christmas Cactus plants and they say you are suppose to put them outside to rest and then bring them back inside when it is fall so they will bloom for Christmas. Well, someone forgot to tell them that.
They are both loaded with so many blooms! I don't think they will last until Christmas, so I am enjoying them now!
Thanks for stopping by,
Nancy
Wednesday, November 1, 2017
Halloween Coffee Cup Treats
I have been seeing all these adorable coffee cup designs all over the blogs and decided that I wanted to make some for Jennifer's classmates, as well as for the Wellness Center. I'm sure you can get these cups in a variety of places but I purchased mine online at - Webstaurant Store. I ended up making 50 of them, but it really didn't take as long as I thought it would. I started by making a template of the cup by taking one apart for the proper dimensions. These are 5 oz. cups. It was a great way of using up some old Halloween DSP and scraps. I made two different designs. The one for the Wellness Center I used the stamp from the Spooky Cat stamp set punching it out with the Everyday Label Punch.
Using assembly line production helped move this project along.
I punched out a circle for the top and glued it on. I purchased some straws from Hobby Lobby and cut them in half to put in the top of the cup. Then I die cut a bunch of Spiders and adhered them to the straw. Of course, I put some chocolate goodies inside.
Here is a sampling of different styles I made.
Here is the box all ready to go to the Wellness Center.
I used the Seasonal Chums stamp set and dies for the ones that I made for Jennifer to give all to her friends, as she wanted their names put on a tag.
I think they turned out so cute!
Here is a picture I took somewhere during the process.
I think this is a great little treat that can be used for any occasion. I have seen them decorated for Christmas, Valentine's Day, etc. What a great versatile cup. We had a great time celebrating Jennifer's birthday and Halloween.
Thanks for stopping by,
Nancy
Using assembly line production helped move this project along.
I punched out a circle for the top and glued it on. I purchased some straws from Hobby Lobby and cut them in half to put in the top of the cup. Then I die cut a bunch of Spiders and adhered them to the straw. Of course, I put some chocolate goodies inside.
Here is a sampling of different styles I made.
Here is the box all ready to go to the Wellness Center.
I used the Seasonal Chums stamp set and dies for the ones that I made for Jennifer to give all to her friends, as she wanted their names put on a tag.
I think they turned out so cute!
Here is a picture I took somewhere during the process.
I think this is a great little treat that can be used for any occasion. I have seen them decorated for Christmas, Valentine's Day, etc. What a great versatile cup. We had a great time celebrating Jennifer's birthday and Halloween.
Thanks for stopping by,
Nancy
Monday, October 30, 2017
Jennifers Birthday Card
Well, it's a little hectic around here between Halloween and Jennifer's birthday. Hard to believe our little pumpkin will be four years old tomorrow. It seems like yesterday that we were all rushing to the hospital for the emergency C-section on our daughter. She is growing by leaps and bounds. I usually make Jennifer a recordable card for her birthday. SU doesn't sell them anymore, and I have one more left in my stockpile. She loves them and has them in her room. For some reason, this year's card was hard to make. I had a lot of ideas but nothing that I was happy about. I had to get down to business this weekend as time was running out. I started out with the base card in Pretty N' Pink. It is a retired SU color but I have a few sheets left. I used my # of Years framelits to cut out the number four in some pretty glimmer paper I had on hand and then mounted it on two cutouts of cardboard to make it stand out.
I used the # of Years stamp set for my sentiment a well. I had such a wonderful surprise last week. My friend Martha from Florida sent me a surprise package - it was a misti!! I have been thinking about it since a lot of my friends use it but it was not top on my list. Well, this is the first card I used with it and what a pleasure! I ended up having to restamp my sentiment and it was so clean and neat! Loved it!! I used the framelits from the Birthday Delivery set on the DSP for the presents and party hats. I then decided to add some ribbon I had in my stash on the front to finish it off.
For the inside I used the framelits again for the cake and ribbons. I thought it was pretty neat that the one of the cakes had 4 candles on it. I used one of my Action Wobbles for the cake and twine for the balloon strings. I was happy how it turned out. Well, I hope everyone has a great week and a wonderful Halloween!!
Thanks for stopping by,
Nancy
I used the # of Years stamp set for my sentiment a well. I had such a wonderful surprise last week. My friend Martha from Florida sent me a surprise package - it was a misti!! I have been thinking about it since a lot of my friends use it but it was not top on my list. Well, this is the first card I used with it and what a pleasure! I ended up having to restamp my sentiment and it was so clean and neat! Loved it!! I used the framelits from the Birthday Delivery set on the DSP for the presents and party hats. I then decided to add some ribbon I had in my stash on the front to finish it off.
For the inside I used the framelits again for the cake and ribbons. I thought it was pretty neat that the one of the cakes had 4 candles on it. I used one of my Action Wobbles for the cake and twine for the balloon strings. I was happy how it turned out. Well, I hope everyone has a great week and a wonderful Halloween!!
Thanks for stopping by,
Nancy
Thursday, October 26, 2017
Halloween Goodies
Hope everyone is having a good week! Fall is definitely in the air around here. I guess I'm going to have to get out some jackets to wear! Today's post is one of the trays I made up for my daughter to take to the nurses at the hospital in her unit. I have been making these cute ghost lollipops for years and the kids always ask for them again and again They are just lollipops wrapped in a coffee filter which has been stamped with a face and then a little bow tied around them.
The cats are made from the Spooky Cat stamp set. These little guys are filled with a Hershey kiss. They are all over the blogs. The holder is made with a piece of paper 4" x 1" and scored at 1", 2", and 3" and folded into a triangle and glued in place. I stamped a piece of paper with the cat stamp and punched it out with the cat punch. Then punch out another plain cat for the back. I glued in the front piece first to the triangle and then the back. The best part is to place a Hershey kiss in the triangle.
Of course, you must taste a few to make sure the candy is fresh!!
Come back later this week to see the birthday card that I'm making Jennifer.
Thanks for stopping by,
Nancy
The cats are made from the Spooky Cat stamp set. These little guys are filled with a Hershey kiss. They are all over the blogs. The holder is made with a piece of paper 4" x 1" and scored at 1", 2", and 3" and folded into a triangle and glued in place. I stamped a piece of paper with the cat stamp and punched it out with the cat punch. Then punch out another plain cat for the back. I glued in the front piece first to the triangle and then the back. The best part is to place a Hershey kiss in the triangle.
Of course, you must taste a few to make sure the candy is fresh!!
Come back later this week to see the birthday card that I'm making Jennifer.
Thanks for stopping by,
Nancy
Monday, October 23, 2017
Spooky Halloween Card
I hope everyone had a wonderful weekend! The weather was so beautiful here. We had Jennifer for a sleepover and it was so nice to spend time outside. After she left, I put together her Halloween card. I saw it on Pinterest and knew she would love it. She has 2 cats at home along with her faithful companion dog Willow. My daughter has instilled the love of all God's creatures to her - with the exception of the occasional bear that wonders through their yard!
I loved how this card came together. I used several dies, paper and accessories which I will list in the recipe below. I decided to decorate the inside as well along with the envelop.
I love how the dies cut out the DSP images. I think Jennifer will love it!
Thanks for stopping by,
Nancy
Recipe:
Paper - Black, Spooky Night DSP
Ink - Basic Black
Stamps - Spooky Cat
Accessories - Top Note Die, Patterned Pumpkin Framelits Dies, Cat Punch, Twine
I loved how this card came together. I used several dies, paper and accessories which I will list in the recipe below. I decided to decorate the inside as well along with the envelop.
I love how the dies cut out the DSP images. I think Jennifer will love it!
Thanks for stopping by,
Nancy
Recipe:
Paper - Black, Spooky Night DSP
Ink - Basic Black
Stamps - Spooky Cat
Accessories - Top Note Die, Patterned Pumpkin Framelits Dies, Cat Punch, Twine
Friday, October 20, 2017
Halloween Card - Pumpkins
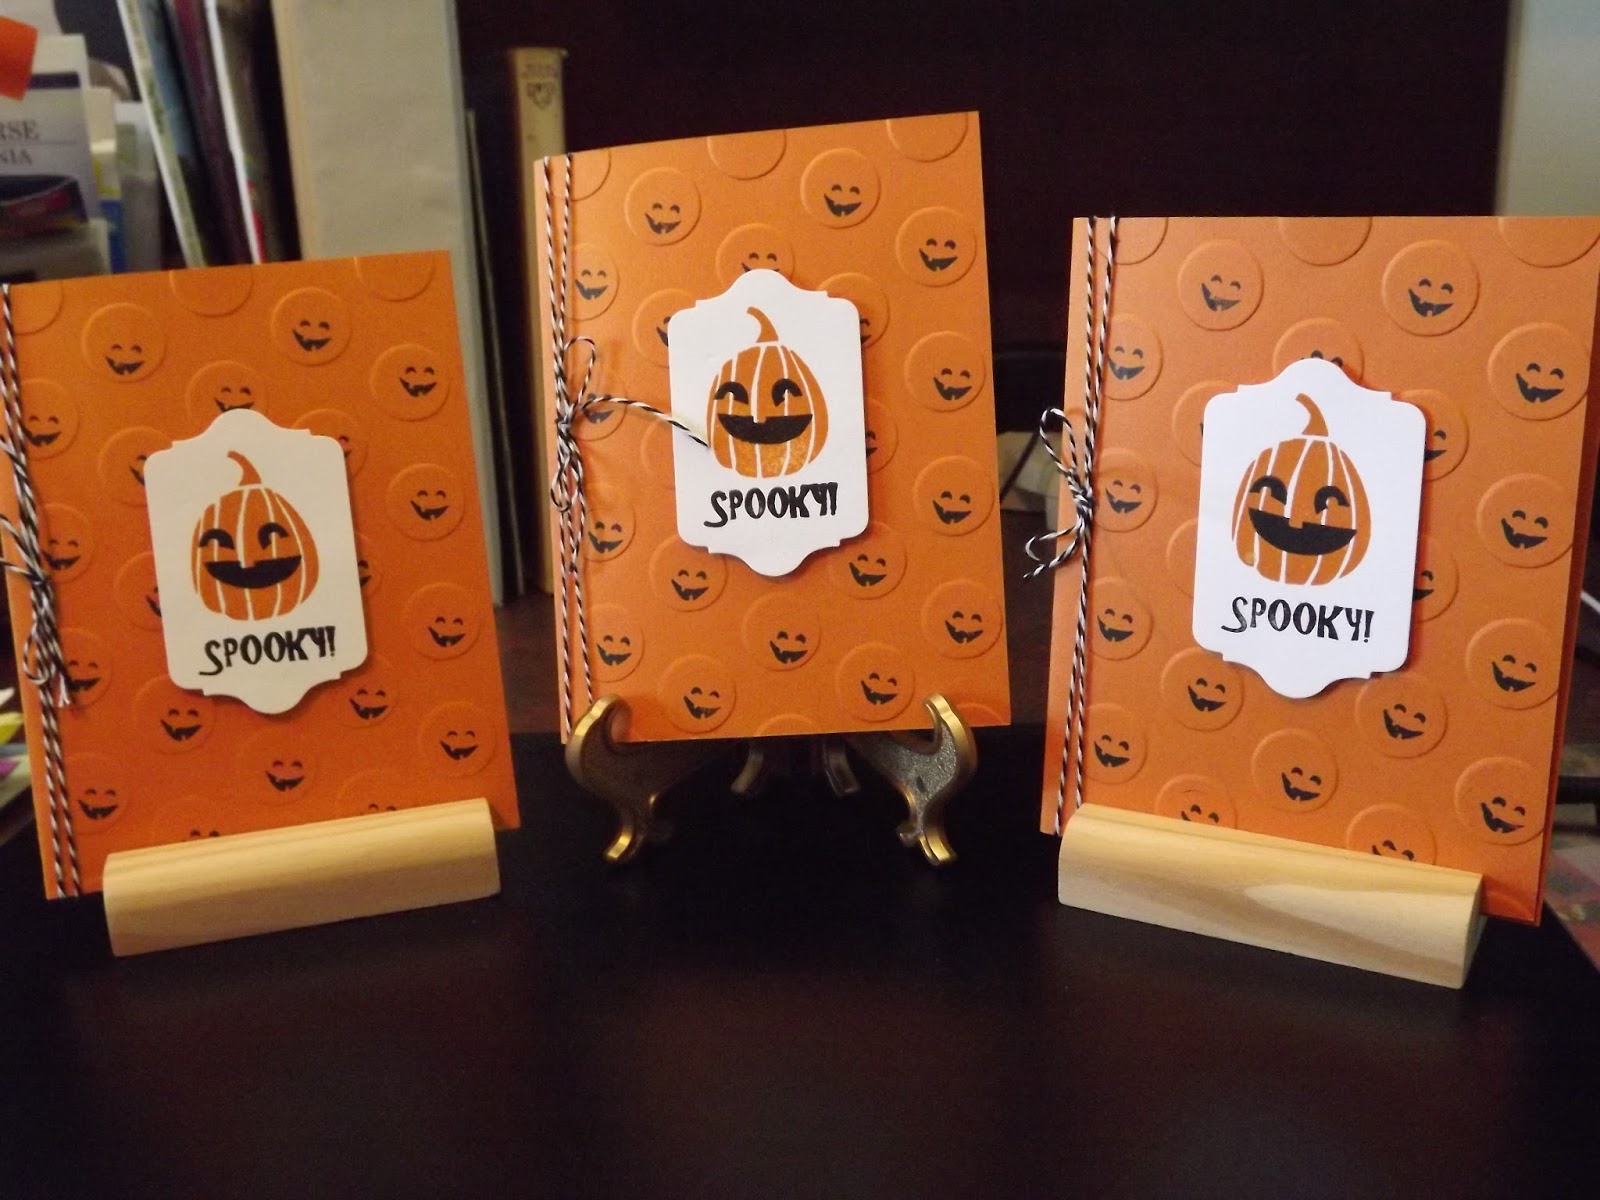
Well, another Friday is here! I have been working on my goodies and hope to get them done in time. I needed to make some more Halloween cards and came across this cutie on Pinterest. I changed it up a bit and loved how it turned out.
It was a pretty simple card to put together. I used SU's Large Polka Dots embossing folder and stamped the circles with a small pumpkin face I had. I used SU's Chalk Talk framelits die and stamped it with the pumpkin and face from the Fall Fest stamp set.
The Spooky sentiment is from a stamp set I had won from Cardz TV - More Spooky Sayings. It is such a great Halloween set. On the inside, I used the stamp from the Halloween Treat stamp set.
I love that little spider! I have used this stamp set so often. Then I just tied some black and white twine down the side and it was complete. Don't you just love it! I love the cute little faces! Hope everyone has a great weekend. It is suppose to be a warm one here, so we intend to be outside!!
Thanks for stopping by,
Nancy
It was a pretty simple card to put together. I used SU's Large Polka Dots embossing folder and stamped the circles with a small pumpkin face I had. I used SU's Chalk Talk framelits die and stamped it with the pumpkin and face from the Fall Fest stamp set.
The Spooky sentiment is from a stamp set I had won from Cardz TV - More Spooky Sayings. It is such a great Halloween set. On the inside, I used the stamp from the Halloween Treat stamp set.
I love that little spider! I have used this stamp set so often. Then I just tied some black and white twine down the side and it was complete. Don't you just love it! I love the cute little faces! Hope everyone has a great weekend. It is suppose to be a warm one here, so we intend to be outside!!
Thanks for stopping by,
Nancy
Subscribe to:
Posts (Atom)