Tuesday, April 30, 2019

Happy Birthday Rachel!!

It is hard to believe that Rachel is 19 years old today!!  Yes, time is going by fast!!  I recently fell in love with some stamps and dies from Heartfelt Creations and decided to make her birthday card from the Sugarspun Collection.  I don't think Rachel has ever seen a cupcake that she doesn't like.


Here is the finished card.  I used the dies to cut out the base card in Whisper White and then used a preprinted ice cream cone from their paper collection and cut it out for my layer.  I added some glitter to the ice cream and glossy accents to the cherry.  I had some pink glitter paper and used one of the dies to cut out the decoration and glue it on the cone.


For inside my card, I cut another ice cream from Whisper white and added a sentiment from the Cool Treats Stamp set from SU.


The paper collection had some cute smaller ice cream cones, so I decided to cut some out with my punches and decorate the gift bag.


Here is the front of the bag.


Here is the back of the bag.


I also cut out a little tag to put on the bag and a cute little stamp for my envelope.


Here is the back of the envelope.


Here is the total package all put together.


I really like how it turned out and hope Rachel likes it as well.  Have a great week!

Thanks for stopping by,

Nancy


Friday, April 26, 2019

Dandelion Wishes Card

I loved this stamp set when it came out!  It brought back so many memories when I was a kid - blowing the dandelions and making wishes!!  In retrospect, I'm sure my Dad didn't appreciate that in on his lawn.  There are  a lot of examples on Pinterest, but I fell in love with this card that Brenda made on her blog - VIDEOI loved the technique she used to highlight the dandelions.


I also love Lemon Lime Twist CS which I used for my base card.  I'm so sorry this color is retiring.  This was one of the best greens SU has had.  I covered the front panel with some Brights DSP I had in my stash.  My green layer - 4 3/4" x 3 1/2" came from my Botanicals Gardens pack and the blue layer - 4 1/2" x 3 1/4" came from my Share What You Love DSP.  I used Old Olive ink for my dandelion.  I then used my Whisper White craft ink and a dauber to highlight my dandelions.  I let then dry for awhile and then did it a second time.  I love how the craft ink shows up


 I made my own colored ribbon by using a dauber and Lemon Lime Twist ink.   My sentiment was on Whisper White - 3" x 3/4".  I just love this sentiment.  I then added some pearls to the centers of the dandelions.  You could use this card for so many occasions. 


I tried multiple times to take this picture.  I don't why it turned out so fuzzy.  I used one of the stamps from the set of the little "puffs" flying in the air for my inside. 


I also decided to use one of the other stamps and stamp the back of the envelopes.  I think it turned out so cute.  Our Spring weather has turned to rain, clouds and thunderstorms.  But at least it is not snow!!

Thanks for stopping by,

Nancy


Tuesday, April 23, 2019

Best Bunny Easter Card

Well, I hope everyone had a blessed Easter.  We had a great day Sunday.  The weather stayed good, so we didn't have to have the egg hunt with umbrellas!!  We had way too much food and my carrot cake turned out so good!  I'm trying to get things organized here and realized that I didn't share the Easter card I made for the kids.  As you know, I fell in love with the Best Bunny and made cards with the stamp set and punch.


These came together so quick and easy which was good as I was running out of time.  I used Daffodil Delight CS for my card base and a layer of Whisper White that measured 5" x 3 3/4".  After I punched the bunnies out in DSP, I glued the bottom half on the layer and then the top separately leaving enough room for the greeting.


I stamped the grass from the stamp set and backed the layer with some foam paper and adhered it to my CS.  I like how this pops the layer up better than dimensionals.


For my inside sentiment, I used my Michael's $1 stamps again and stamped the small bunny from the stamp set.  I loved how they turned out and the kids did as well.


Since I put them in the girls baskets, I stamped on the back of the envelopes as well.  I don't about you but I could keep stamping Easter cards.  I love this holiday and hated to see it end.  It is really spring here today with warm temperatures and all the flowers are popping out after their winter's rest.

Thanks for stopping by,

Nancy


Thursday, April 18, 2019

Easter Lamb Cards and Place setting eggs

Oh my, what a day!!  We thought we would miss the rush and finish up shopping for Easter early this morning, but I guess everyone else had that thought as well.  The stores were packed and of course none of them had enough cashiers.  Aisles were closed and people were not happy.  We finally found our way home and I hope not to have to go out until after Easter.  We are suppose to have miserable rain and winds starting tonight into tomorrow so I guess that is why everyone decided to get up early.  I wanted to post a few things as I'm sure things are going to get hectic around here.  We are going to dye eggs tomorrow so I just finished hard boiling them.  It is amazing how quick they get colored and there is never enough to go around.  So this year, I did a lot more.  We'll see how that goes.

I always go back to one of my favorite stamp sets from SU - Easter Lamb.  Joe actually raised lambs when he was a kid for 4H, so he has a soft spot for them which he passed on to our girls, so I always try to make them an Easter card with a lamb on it.  This stamp set is so simple but you can do so many things with it.  I made this card in 2017 - Easter Lamb - and this card in 2016 - Easter LambThis is the card I made for them this year.


I used one of my favorite CS - Sweet Sugarplum - for my base card and my layer was Falling in Love DSP.  I tied some of the matching ribbon around the layer and popped up the sentiment with some dimensionals.  I stamped my lamb on Very Vanilla CS - 2 1/2" x 2 3/4" and mounted it on Sweet Sugarplum CS - 2 3/4" x 3".  I used Gina K's Amalgam black ink and I really liked it. 


I just used my markers to color the lamb's ears, nose and grass.


For my inside sentiment, I used my $1 stamp from Michael's and decided to use my small butterfly punch to decorate it so to match the DSP and added some metallic pearls.

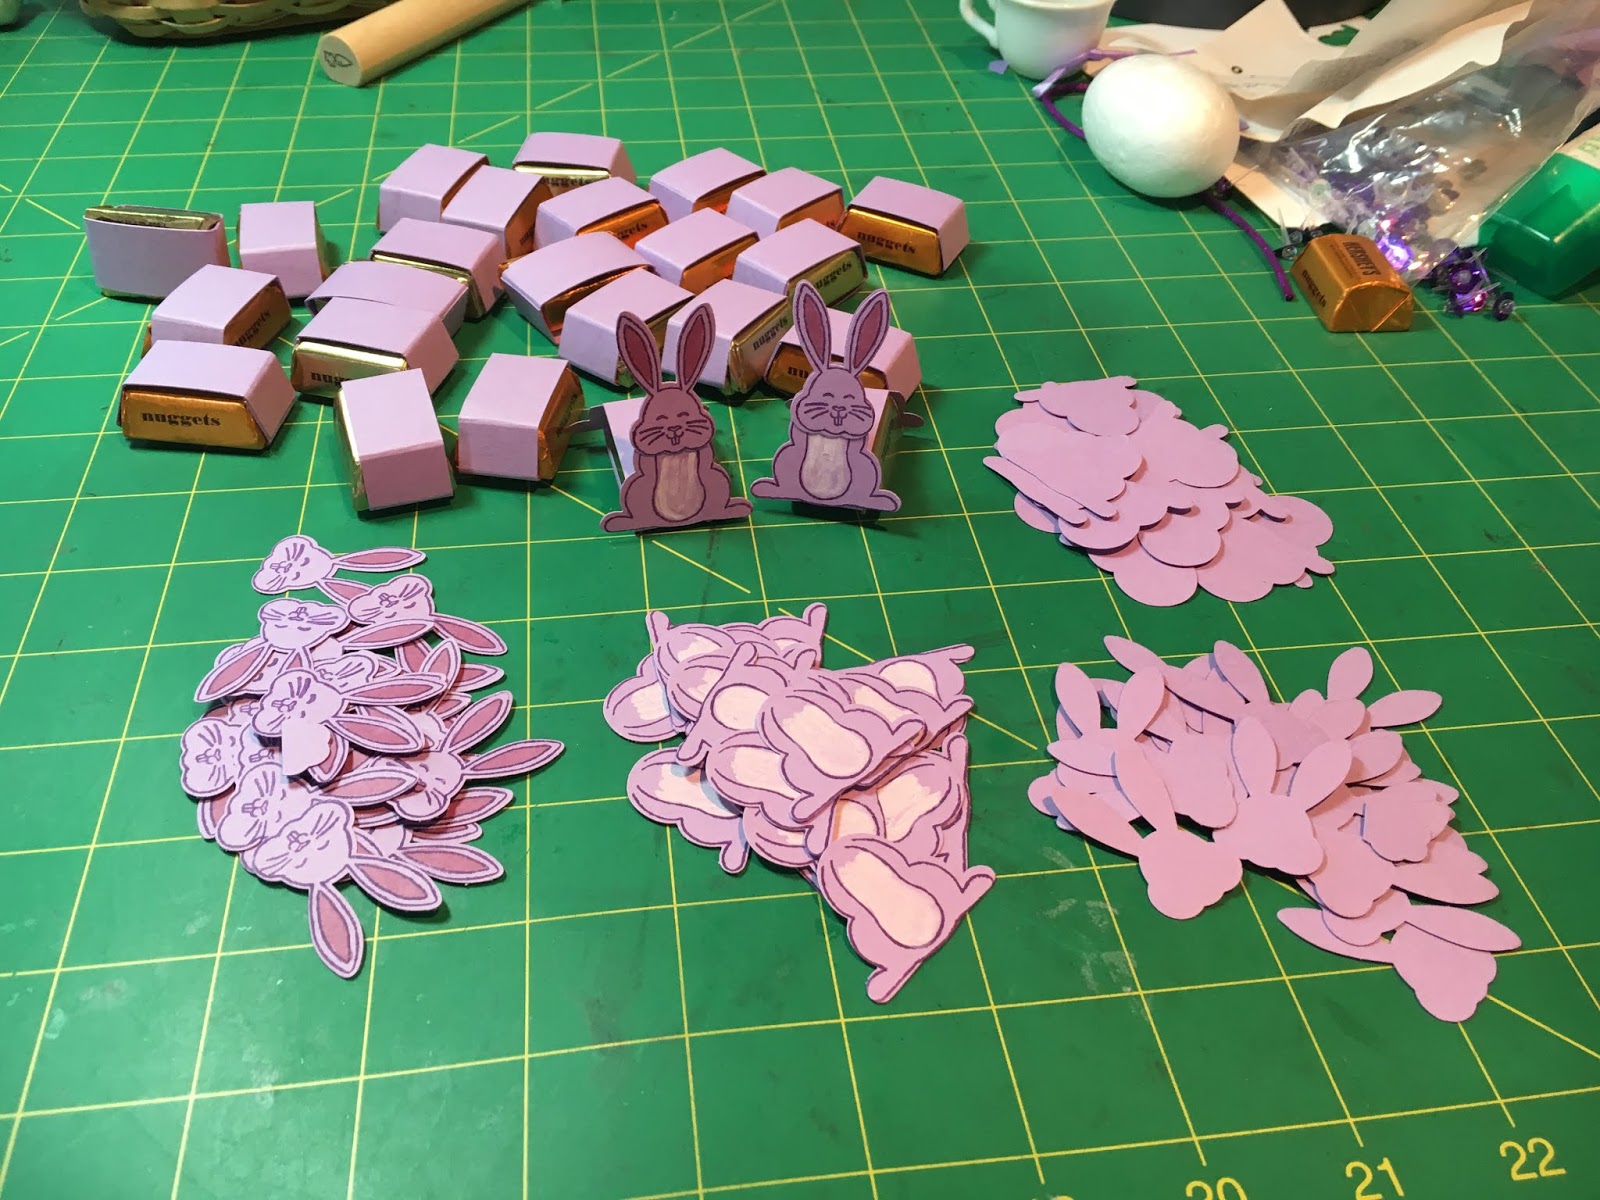
Last night my daughter got out of work early and came up to help me with the rest of the goodies for the Wellness Center.  I saw these cute little bunnies made out of punches on Pinterest and decided to make up a tray for her to take.  What I thought would be easy turned out to be going to 5 different stores to find the Dove Chocolate Coconut Eggs! 


The body is made with the large oval punch and the ears with the small oval punch.  I used a large glue dot to glue the candy egg on the large oval punch and then some tombw glue to adhere the small cotton tail.


I think they turned out so cute!  When looking for the eggs, I found some with peanut butter in them, so of course I had to get them.  I saved some and plan to put them on my Easter table for each place setting.  I'm almost finished making my cards for the girls - just under the wire! 

Thanks for stopping by,

Nancy


Tuesday, April 16, 2019

Hershey's Nugget Bunnies

I finally finished my last tray of these adorable bunnies that I made for my daughter to take to the Wellness Center.  I had a lot of ideas going through my head as to what I would make for the Center, but when I saw these cute little bunnies they won hands down!!  I love Brenda's -  VIDEOS - and this was no exception.  Good thing I had order this punch and stamp set as it became unavailable for a while but is now online again.  I just fell in love with this bunny and am so glad I have him in my collection.  I don't usually get a lot of punches, but I'm sure I will get a lot of use out of it.  Because of the amount I had to make, it did take me awhile but I'm sure the folks will enjoy them as much as I did making them. 


Using the method I posted before about lining up your stamps for the punch, it make the job easier and Brenda gave instructions for mass production as well which is always appreciated.  To make my life easier, I just went with one color - Highland Heather CS and used Gorgeous Grape for my ink.  If I have time I'm going to make a few in different colors for the girls. 


I put together the bottoms first and then got all the other pieces ready before I glued them.


I didn't have a white chalk marker, so I used my white craft ink for their little tummy's and colored in their ears with markers before I glued them to the bottom.


Here is one of the trays with them already to travel to their new homes!  I made about 60 of them so the punch definitely had a work out.


Here is a close up of the bottom with a little white tail and their cute little face.  Good thing I had extra candy to help me along the way!

It seems like I never start earlier enough.  I have a few more goodies to make, so we will see if I make it under the wire.  I hope everyone is having a good week in anticipation to leading up to Easter.

Thanks for stopping by,

Nancy


Thursday, April 11, 2019

Emoji Sweet Treat Cups

I saw these cute Sweet Treat Cups over on - Rachel Tessman's blog - and fell in love with them.  Jennifer and her friends are big fans of M&M's, and I thought they would enjoy them.  I had ordered the M&M's from Amazon but didn't get to put them together until recently due to my surgery.  I don't know if they still have them in stock, but I'm sure any treats would be great!


These cups I also purchased from Amazon.  They are a little bigger than SU's Sweet Treat cups.  There are a lot of templates out there.  I just made my about 1 1/2" longer.  I used some Bright Designs DSP to cover the bottom cup adhering it with some Tombow glue.


Here are the M&M's that I purchased.


For my lid, I used some Shimmer Ribbon - 3/8" x 12" to decorate the rim and tie a small bow.


To decorate the top of the lid, I used my layering circles in black and daffodil delight CS.  For the eyes, I used a heart punch and a circle punch cut in half for the mouth.


I think they turned out so cute.  Jennifer and her friends loved them.  There are so many ideas that you can use these treat cups.  Hope everyone has a great weekend.  Lots to do here getting ready for the Easter Holiday!

Thanks for stopping by,

Nancy

I entered this post at CardzTV Challenge #87 - Anything Goes.


Monday, April 8, 2019

Best Bunny Easter Card

Well, I managed to get into the craft room in-between the lovely sunshine we have had this weekend.  It is so difficult to stay inside after the lousy winter.  I saw this cute card on Pinterest and since I still have the Best Bunny stamp set on my desk I decided to make it.  I am so drawn to the Gala Gingham DSP.  The colors are just so pretty and I love checks!!  I used Whisper White for my CS and covered up half the card with the DSP.


I taped some ribbon down to cover where the paper meets, and used the Teeny Tiny Wishes stamp set from SU for my sentiment.  I then used my bunny punch to make the bunnies and fussy cut the cute little carrots.


I used my oval layering dies to cut two ovals - one in the reverse side of the DSP and the larger one in the Highland Heather CS and popped them up with some dimensionals.  Then I added some of the Gala Gingham Sequins.  I think it turned out so cute.  I love this adorable bunny!


I used this cute sentiment from the Best Bunny stamp set for the inside with some sequins as well.   I hope everyone had a great weekend.  Lets hope it is this nice for Easter!

Thanks for stopping by,

Nancy


Thursday, April 4, 2019

Bunny Easter Card

We have been so busy around lately, that I haven't had much craft time.  I guess I'm going to have to put it in high gear to get the things accomplished that I want for Easter.  It was so windy here today that we stayed inside most of the day and I finally got back to my craft room to start making some Easter cards.  I fell in love with the new bunny punch that SU put out with the matching Best Bunny stamp set.  Somewhere I saw this great idea for using this punch (or any with various punch outs) and it worked out so great!  The first thing you do is make a template with the punch.   Then I laid the stamps on the punch out.  Once they were all in place, I took a block and pressed down over them and viola!  Then you just stamp out how many you want and they are in perfect alignment to be punched.  I then put the template in the stamp set case for future use.


I used Whisper White CS for my base card, as well a my layer which was 3 3/4" x 5".  I then punched out my little bunnies in Whisper White and the bunny's body in Gala Gingham DSP and colored them in with my markers.  I adhered them together with my glue.


For my circles, I punched 1 with the 1 1/2" circle punch, 1 with the 1 1/4" circle punch, 2 with the 1" circle punch and 5 with the 1/2" circle punch.


I stamped my sentiment with Memento Black ink and glued my circles on first. 


Then I popped up my bunnies with dimensionals.  While watching one of Jennifer McGuire's videos, she used craft foam to pop up her entire layer, so I thought I would try it out.  I loved how it turned out. 


For my inside sentiment, I used one of my old favorites from Michel's $1 bin that I had for years.  I recently went to Michael's looking for something and their $1 bin is now $2.  I guess that's a sign of the times!  I also decided to add some circles with left over scraps.


Instead of hoarding the rest of the scraps, I decided to cover the flaps with the DSP.  I love this paper.

Thanks for stopping by,

Nancy